> ## Documentation Index
> Fetch the complete documentation index at: https://docs.florists.digital/llms.txt
> Use this file to discover all available pages before exploring further.
# Create an Order
> Step-by-step guide to creating a new order.
Use **Create Order** to enter a phone, walk-in, or other everyday order. This guide walks you through each step.
Events includes five manually entered everyday orders per calendar month for each licensed location, and this screen shows how many are left. Event production orders are created from their [parent event](/events/event-orders) and don't use the allowance.
## Creating a new order
Select the type of order you're creating:
* **Gift** for standard bouquets and arrangements
* **Funeral** for sympathy flowers and tributes
* **Corporate** for business clients
Event orders aren't created here — they're generated from the [events workflow](/events/event-orders).
You can also set the **Occasion** (Birthday, Anniversary, Sympathy, etc.) and the **Order Source** (Walk In, Phone, Email, Website, or Other).
Search for an existing customer by name, email, or phone number. If they're new, you can create a customer record on the spot.
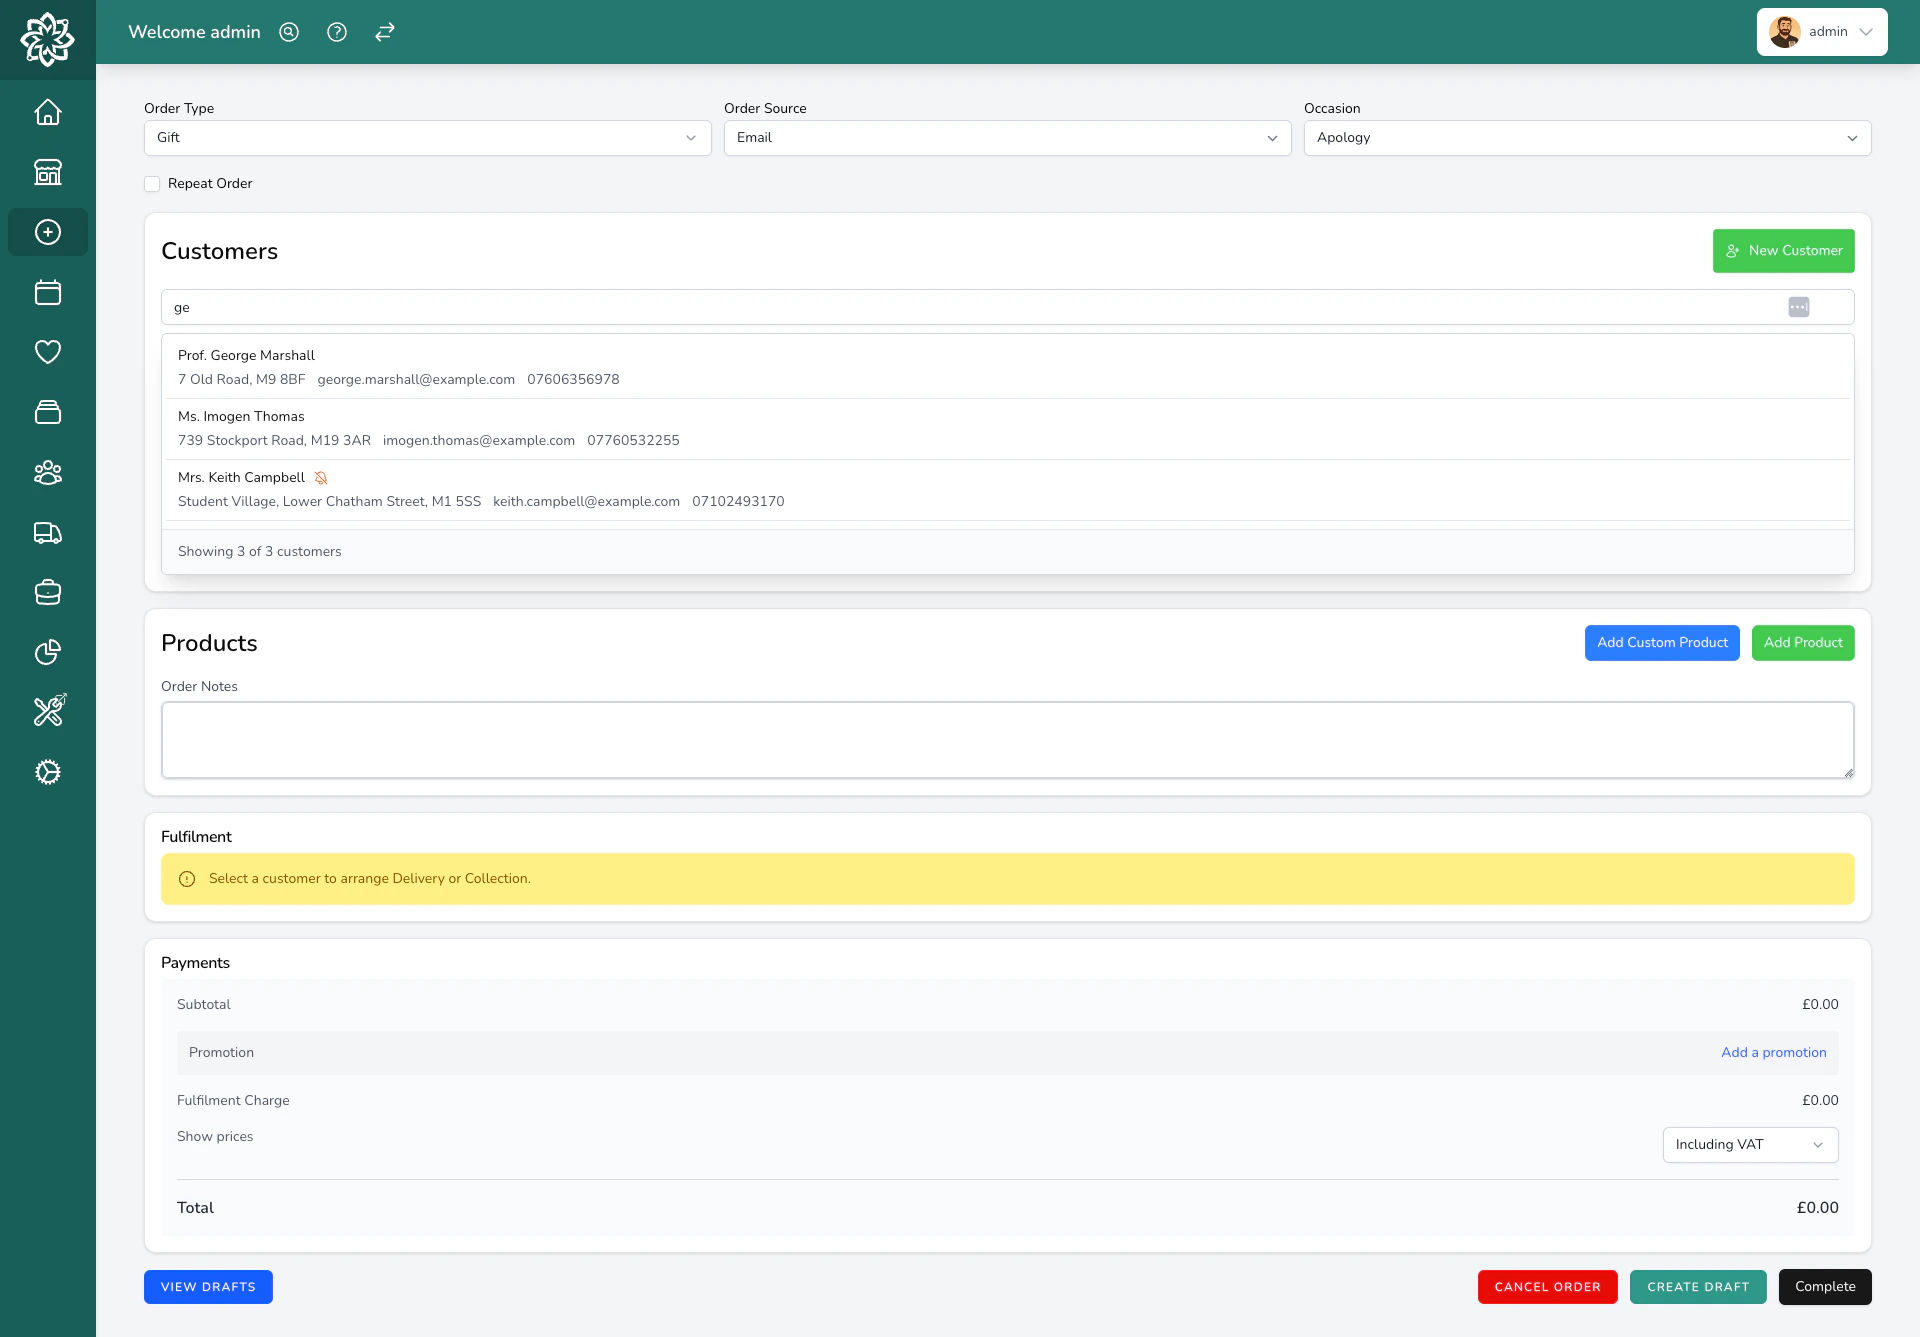 If the recipient is different from the person paying, you can set a separate **Recipient** with their own name and address.
Choose how the order will be **fulfilled**:
* **Delivery** for local delivery. Enter or confirm the delivery address, and pick a fulfilment date and time slot.
* **Collection** if the customer is picking up. Choose when it should be ready.
* **Relay** to send the order to another florist. Select your relay provider (Direct2Florist, Send to a Friend, or manual). When you select Direct2Florist, a destination picker lets you choose which florist will fulfil it. A relay service charge is added on top of your product total.
* **Courier** to send via a courier service. This requires a courier integration to be set up.
For **relay orders**, delivery notes and general order notes **do not** go through to the receiving florist. Any instructions for them must go in the **florist notes** field — otherwise they won't see them. Relay orders also stay in **Unconfirmed** on your dashboard until the receiving florist accepts them — you can't confirm them yourself.
For **Funeral** orders, you can also set the funeral date and time so the order gets prioritised on your dashboard. When you set the funeral time, Digital Florists suggests a delivery time automatically — by default, 2 hours before the funeral, or the day before for a morning funeral. You can change what counts as a morning funeral, or turn the suggestion off entirely, in your settings. If another funeral order has already been placed for the same day, the **funeral director search** will show it — complete with the deceased's name and contact details — so you can link orders together without re-entering anything. You'll need to set up your funeral directors first — go to [**Customers**](/business/customers), add each funeral director as a contact, and they'll appear in the search when you create funeral orders.
Search your catalogue (included with Orders) by name. Select the **variant** (size) you need and set the quantity.
If the recipient is different from the person paying, you can set a separate **Recipient** with their own name and address.
Choose how the order will be **fulfilled**:
* **Delivery** for local delivery. Enter or confirm the delivery address, and pick a fulfilment date and time slot.
* **Collection** if the customer is picking up. Choose when it should be ready.
* **Relay** to send the order to another florist. Select your relay provider (Direct2Florist, Send to a Friend, or manual). When you select Direct2Florist, a destination picker lets you choose which florist will fulfil it. A relay service charge is added on top of your product total.
* **Courier** to send via a courier service. This requires a courier integration to be set up.
For **relay orders**, delivery notes and general order notes **do not** go through to the receiving florist. Any instructions for them must go in the **florist notes** field — otherwise they won't see them. Relay orders also stay in **Unconfirmed** on your dashboard until the receiving florist accepts them — you can't confirm them yourself.
For **Funeral** orders, you can also set the funeral date and time so the order gets prioritised on your dashboard. When you set the funeral time, Digital Florists suggests a delivery time automatically — by default, 2 hours before the funeral, or the day before for a morning funeral. You can change what counts as a morning funeral, or turn the suggestion off entirely, in your settings. If another funeral order has already been placed for the same day, the **funeral director search** will show it — complete with the deceased's name and contact details — so you can link orders together without re-entering anything. You'll need to set up your funeral directors first — go to [**Customers**](/business/customers), add each funeral director as a contact, and they'll appear in the search when you create funeral orders.
Search your catalogue (included with Orders) by name. Select the **variant** (size) you need and set the quantity.
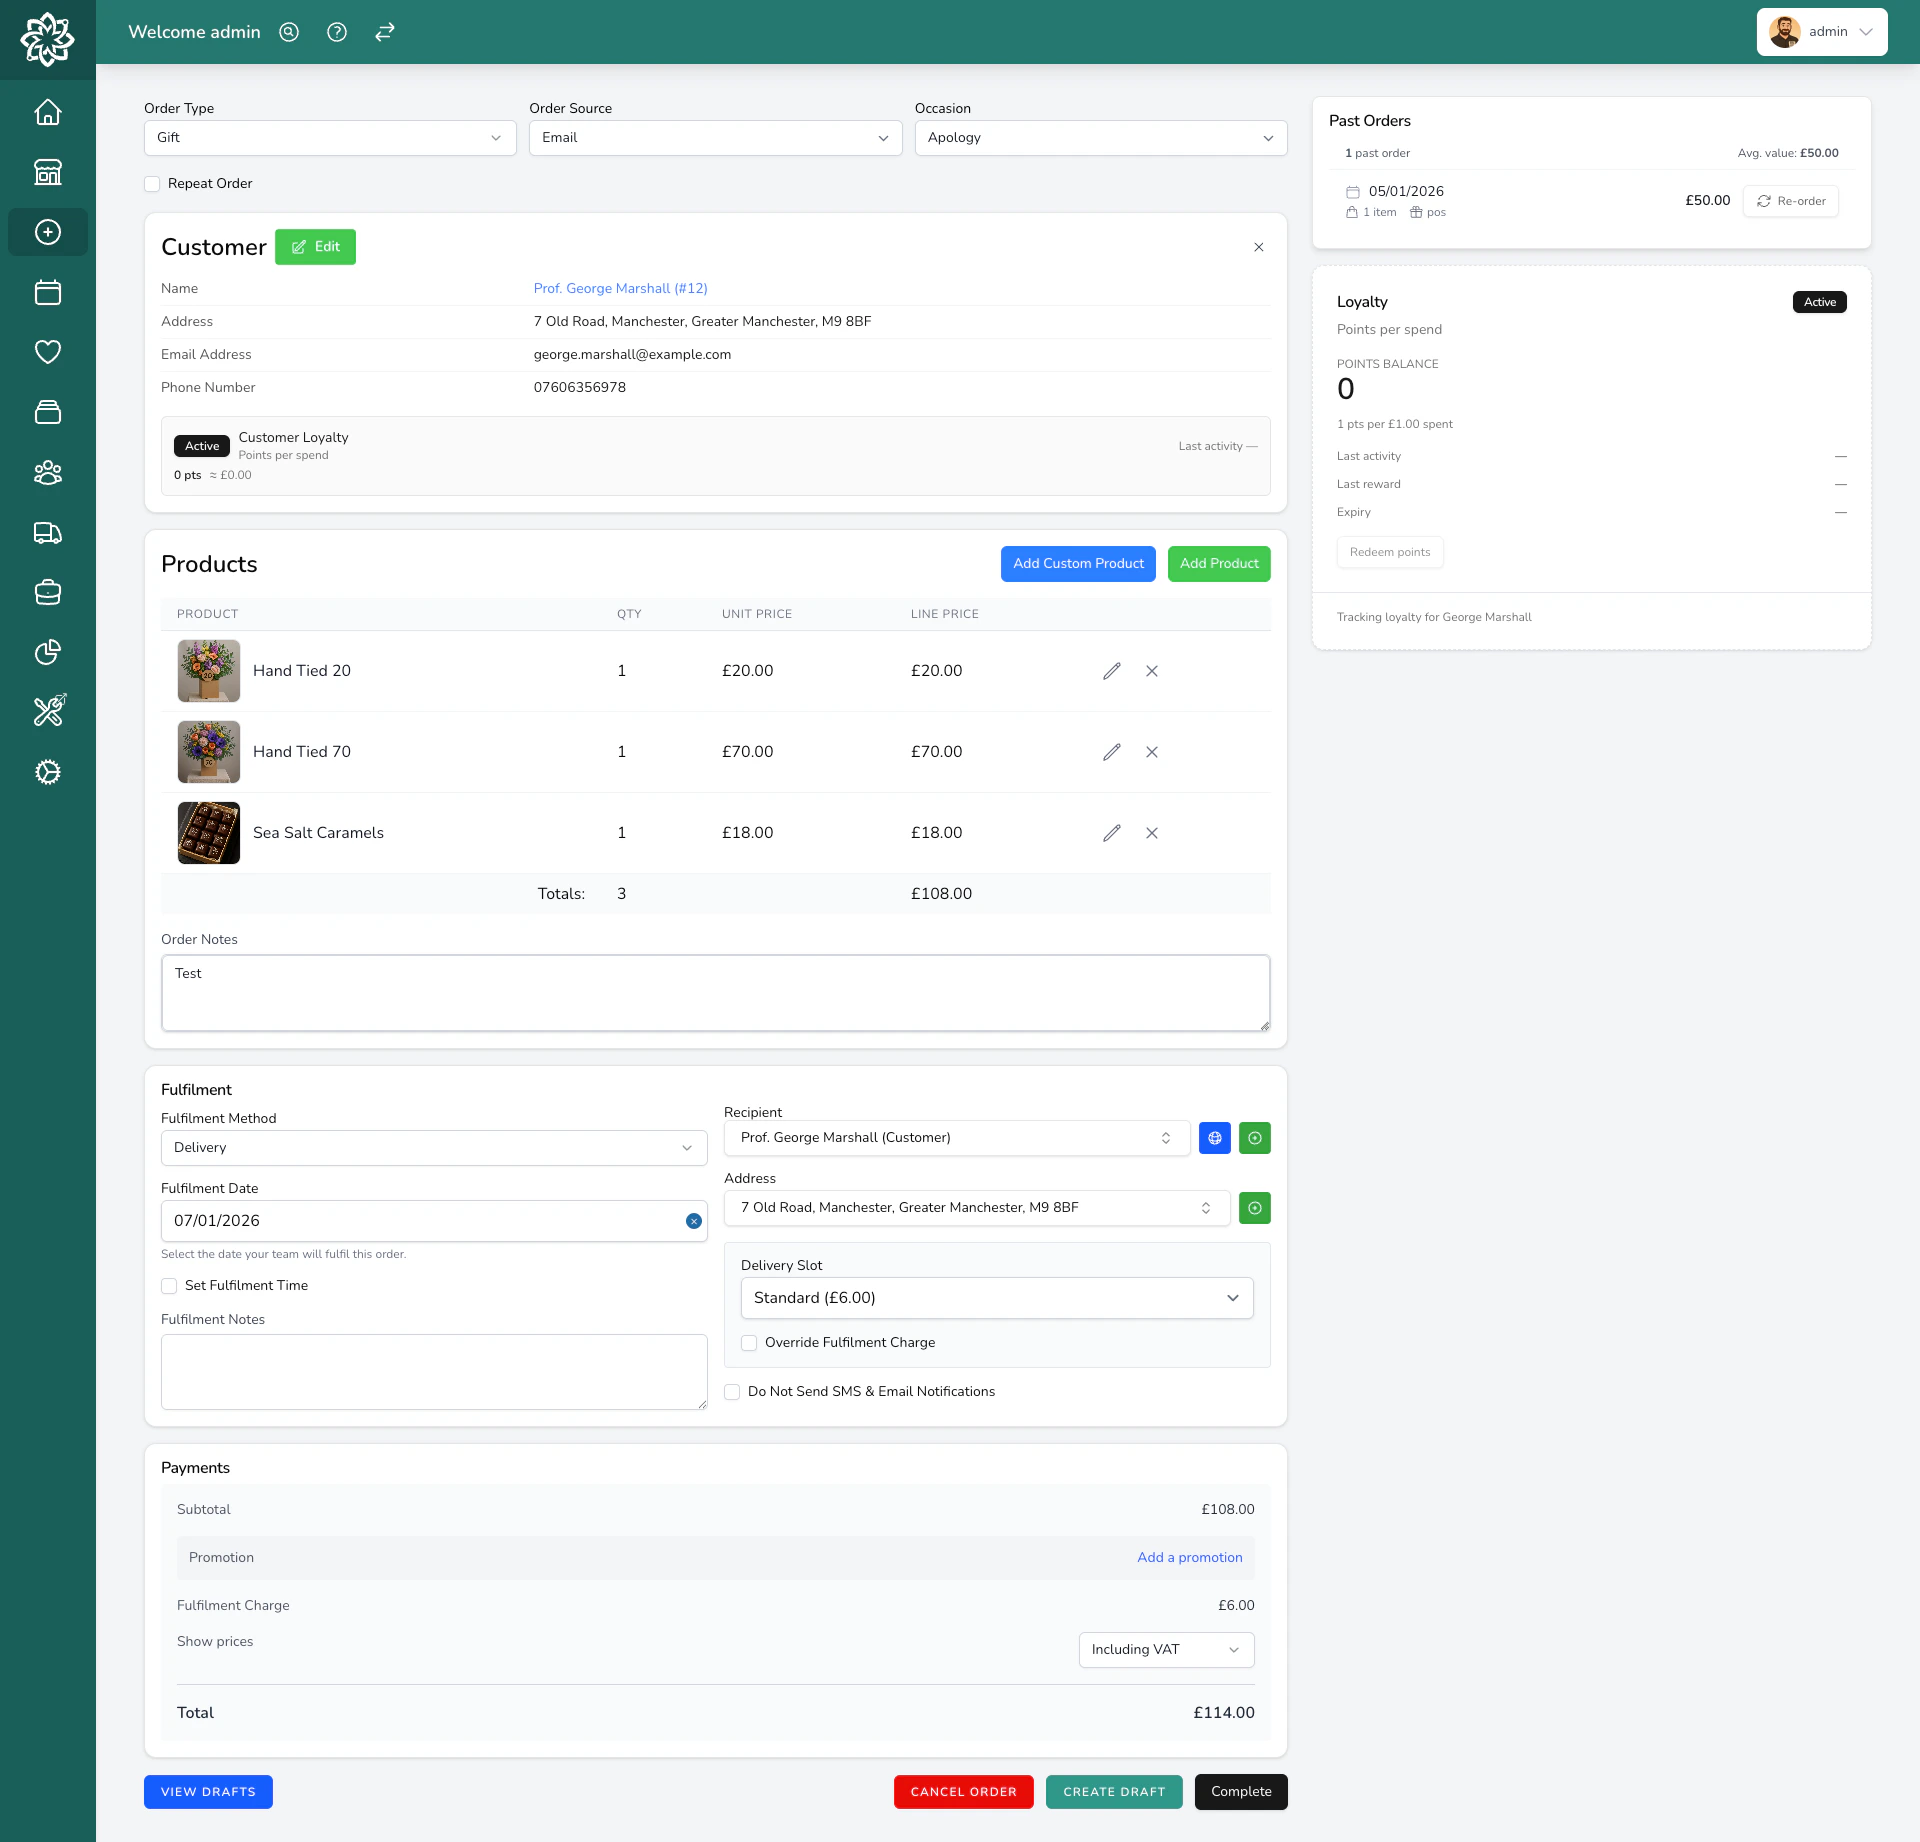 Add a **Custom Item** for a bespoke arrangement or anything that isn't in a retail catalogue. Enter its name and price. This is how you add the five manual everyday orders included with Events.
Add a **card message** if the customer has one, and any **internal notes** for your team (like "Use pink roses, not red").
If a product is stock-tracked, Digital Florists will warn you if you're about to oversell it.
The order total is calculated automatically:
* **Subtotal** is the cost of all products
* **Fulfilment charge** is the delivery or courier fee
* **Tax** is calculated based on your tax rate settings
* **Total** is the final amount
If you have an active promotion, you can apply it here. You can also toggle between **Inc VAT** and **Ex VAT** pricing.
For corporate or account customers, you can add a **Purchase Order Number** for their records.
When everything looks right, click **Complete** to submit the order.
Add a **Custom Item** for a bespoke arrangement or anything that isn't in a retail catalogue. Enter its name and price. This is how you add the five manual everyday orders included with Events.
Add a **card message** if the customer has one, and any **internal notes** for your team (like "Use pink roses, not red").
If a product is stock-tracked, Digital Florists will warn you if you're about to oversell it.
The order total is calculated automatically:
* **Subtotal** is the cost of all products
* **Fulfilment charge** is the delivery or courier fee
* **Tax** is calculated based on your tax rate settings
* **Total** is the final amount
If you have an active promotion, you can apply it here. You can also toggle between **Inc VAT** and **Ex VAT** pricing.
For corporate or account customers, you can add a **Purchase Order Number** for their records.
When everything looks right, click **Complete** to submit the order.
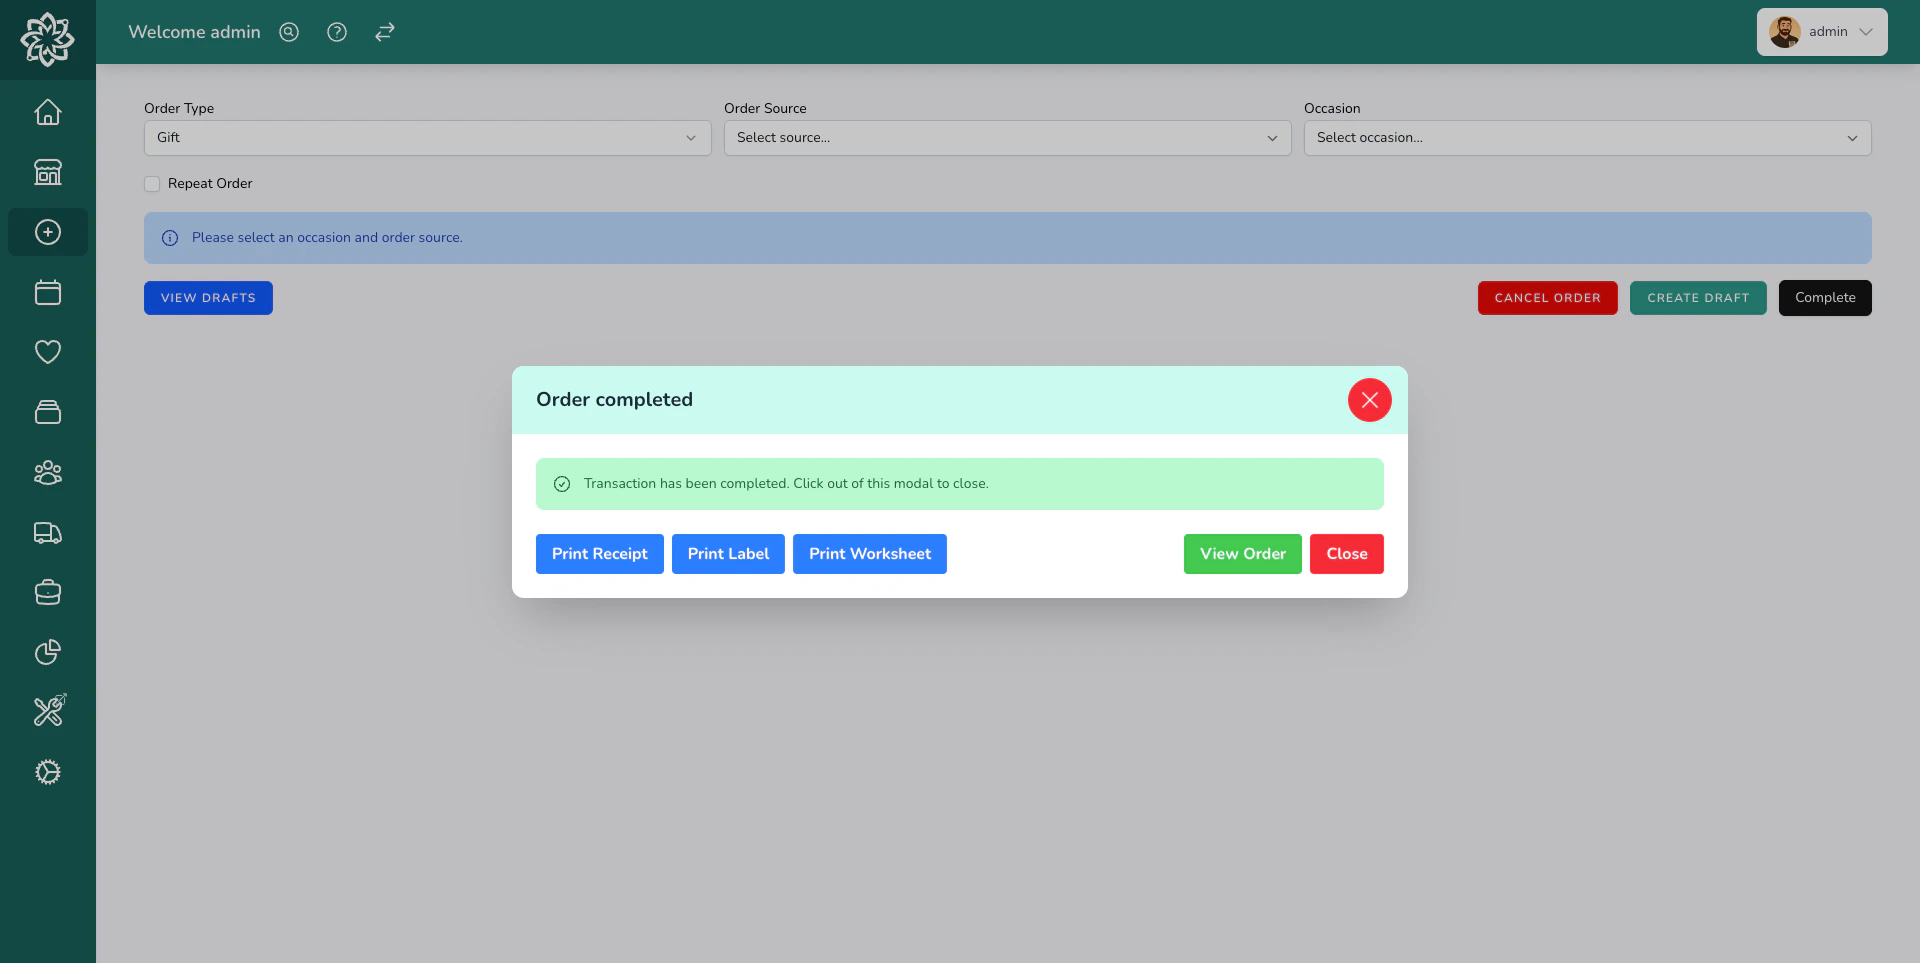 The order will appear on your [Dashboard](/daily-operations/dashboard) ready to be worked on.
## Saving a draft
Not ready to submit yet? Click **Create Draft** to save the order and come back to it later. You can load your drafts by clicking **View Drafts** on the order creation screen. Drafts are automatically deleted after **7 days** by default, but you can change this in your settings.
Drafts don't use the monthly everyday-order allowance until you create the order. Cancelled or voided orders still count, and unused allowance doesn't roll over.
During its creation month, you can correct an included everyday order while it's unpaid, unprinted, and hasn't entered production. Once you record a payment, print a worksheet or label, or start production, its customer, recipient, fulfilment details, and line items are fixed. The order type and source are fixed too. The same applies when the calendar month changes. Create a new order for different work instead of repurposing it.
## Tips for faster order creation
* **Returning customers** have their address pre-filled, saving you time
* **Custom items** are great for one-off requests like "Florist's Choice" with a set budget
* If a customer calls for delivery outside your area, your dashboard suggests converting to a **Relay** order
* For **Repeat Orders**, tick the repeat option during creation to [set up an automatic schedule](/daily-operations/repeat-orders)
## Common questions
Yes. Set the fulfilment date to any future date you like. The order will appear on your dashboard when that date arrives.
Yes, but you need to enable this first. Go to [**Settings** > **General**](/settings/configuration) and turn on **Allow Backdating Orders** under Operations. This is useful for entering orders that were taken in person but not recorded at the time.
Select **Pay on Fulfilment** to complete the order without taking payment now. For corporate customers who pay monthly, you can put the order on their **Account**.
**Re-order** is included with Orders. Search for the customer's name to see eligible previous orders. It isn't available for event orders or relay orders routed through another florist. For regular schedules, use a [Repeat Order](/daily-operations/repeat-orders).
## What's next?
Statuses, transitions, side-effects, and notifications.
Automate orders for customers on a regular schedule.
Take orders at the till for walk-in customers.
Manage all your orders from one screen.
The order will appear on your [Dashboard](/daily-operations/dashboard) ready to be worked on.
## Saving a draft
Not ready to submit yet? Click **Create Draft** to save the order and come back to it later. You can load your drafts by clicking **View Drafts** on the order creation screen. Drafts are automatically deleted after **7 days** by default, but you can change this in your settings.
Drafts don't use the monthly everyday-order allowance until you create the order. Cancelled or voided orders still count, and unused allowance doesn't roll over.
During its creation month, you can correct an included everyday order while it's unpaid, unprinted, and hasn't entered production. Once you record a payment, print a worksheet or label, or start production, its customer, recipient, fulfilment details, and line items are fixed. The order type and source are fixed too. The same applies when the calendar month changes. Create a new order for different work instead of repurposing it.
## Tips for faster order creation
* **Returning customers** have their address pre-filled, saving you time
* **Custom items** are great for one-off requests like "Florist's Choice" with a set budget
* If a customer calls for delivery outside your area, your dashboard suggests converting to a **Relay** order
* For **Repeat Orders**, tick the repeat option during creation to [set up an automatic schedule](/daily-operations/repeat-orders)
## Common questions
Yes. Set the fulfilment date to any future date you like. The order will appear on your dashboard when that date arrives.
Yes, but you need to enable this first. Go to [**Settings** > **General**](/settings/configuration) and turn on **Allow Backdating Orders** under Operations. This is useful for entering orders that were taken in person but not recorded at the time.
Select **Pay on Fulfilment** to complete the order without taking payment now. For corporate customers who pay monthly, you can put the order on their **Account**.
**Re-order** is included with Orders. Search for the customer's name to see eligible previous orders. It isn't available for event orders or relay orders routed through another florist. For regular schedules, use a [Repeat Order](/daily-operations/repeat-orders).
## What's next?
Statuses, transitions, side-effects, and notifications.
Automate orders for customers on a regular schedule.
Take orders at the till for walk-in customers.
Manage all your orders from one screen.