> ## Documentation Index
> Fetch the complete documentation index at: https://docs.florists.digital/llms.txt
> Use this file to discover all available pages before exploring further.
# Point of Sale
> A fast till interface for walk-in sales, phone orders, and in-store payments.
Your **Point of Sale (POS)** is a full-screen till interface built for speed. Whether a customer walks in for a bunch of flowers, picks up a pre-ordered arrangement, redeems a gift card, or pays off an invoice, the POS handles it.
Point of sale requires Orders or Complete.
 ## Choosing your device
The first time you open the POS, you'll be asked to select a **device** — your till. Each device is linked to a location and has its own payment methods, printer settings, and session history. If your shop has one till, you'll see one device; if you have multiple tills, choose the one you're working on.
See [Devices](/settings/devices) for the full guide on registering devices, managing settings per till, and running multi-till setups.
## Opening the till
Before you can take payments, you need to start a **till session**. This tracks every sale and payment during your shift, making cashing up at the end of the day straightforward.
## Choosing your device
The first time you open the POS, you'll be asked to select a **device** — your till. Each device is linked to a location and has its own payment methods, printer settings, and session history. If your shop has one till, you'll see one device; if you have multiple tills, choose the one you're working on.
See [Devices](/settings/devices) for the full guide on registering devices, managing settings per till, and running multi-till setups.
## Opening the till
Before you can take payments, you need to start a **till session**. This tracks every sale and payment during your shift, making cashing up at the end of the day straightforward.
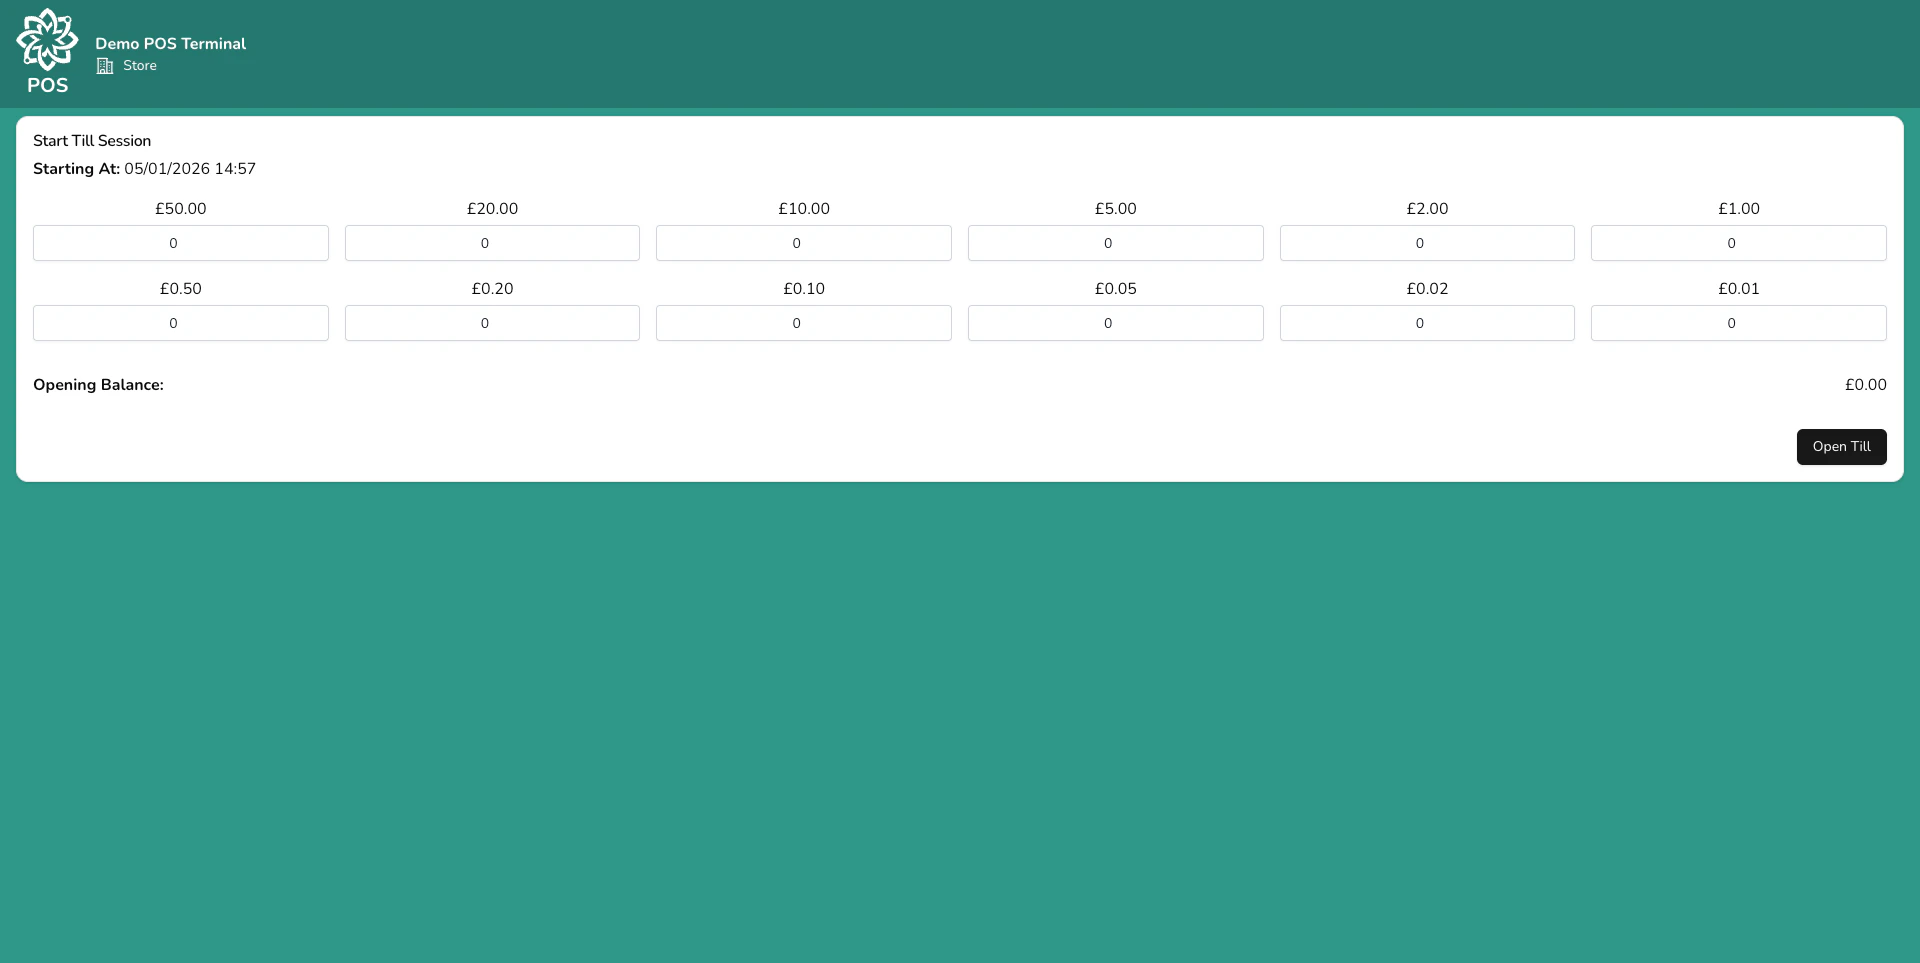 Choose your name from the team list. This records who opened the session and who processed each sale.
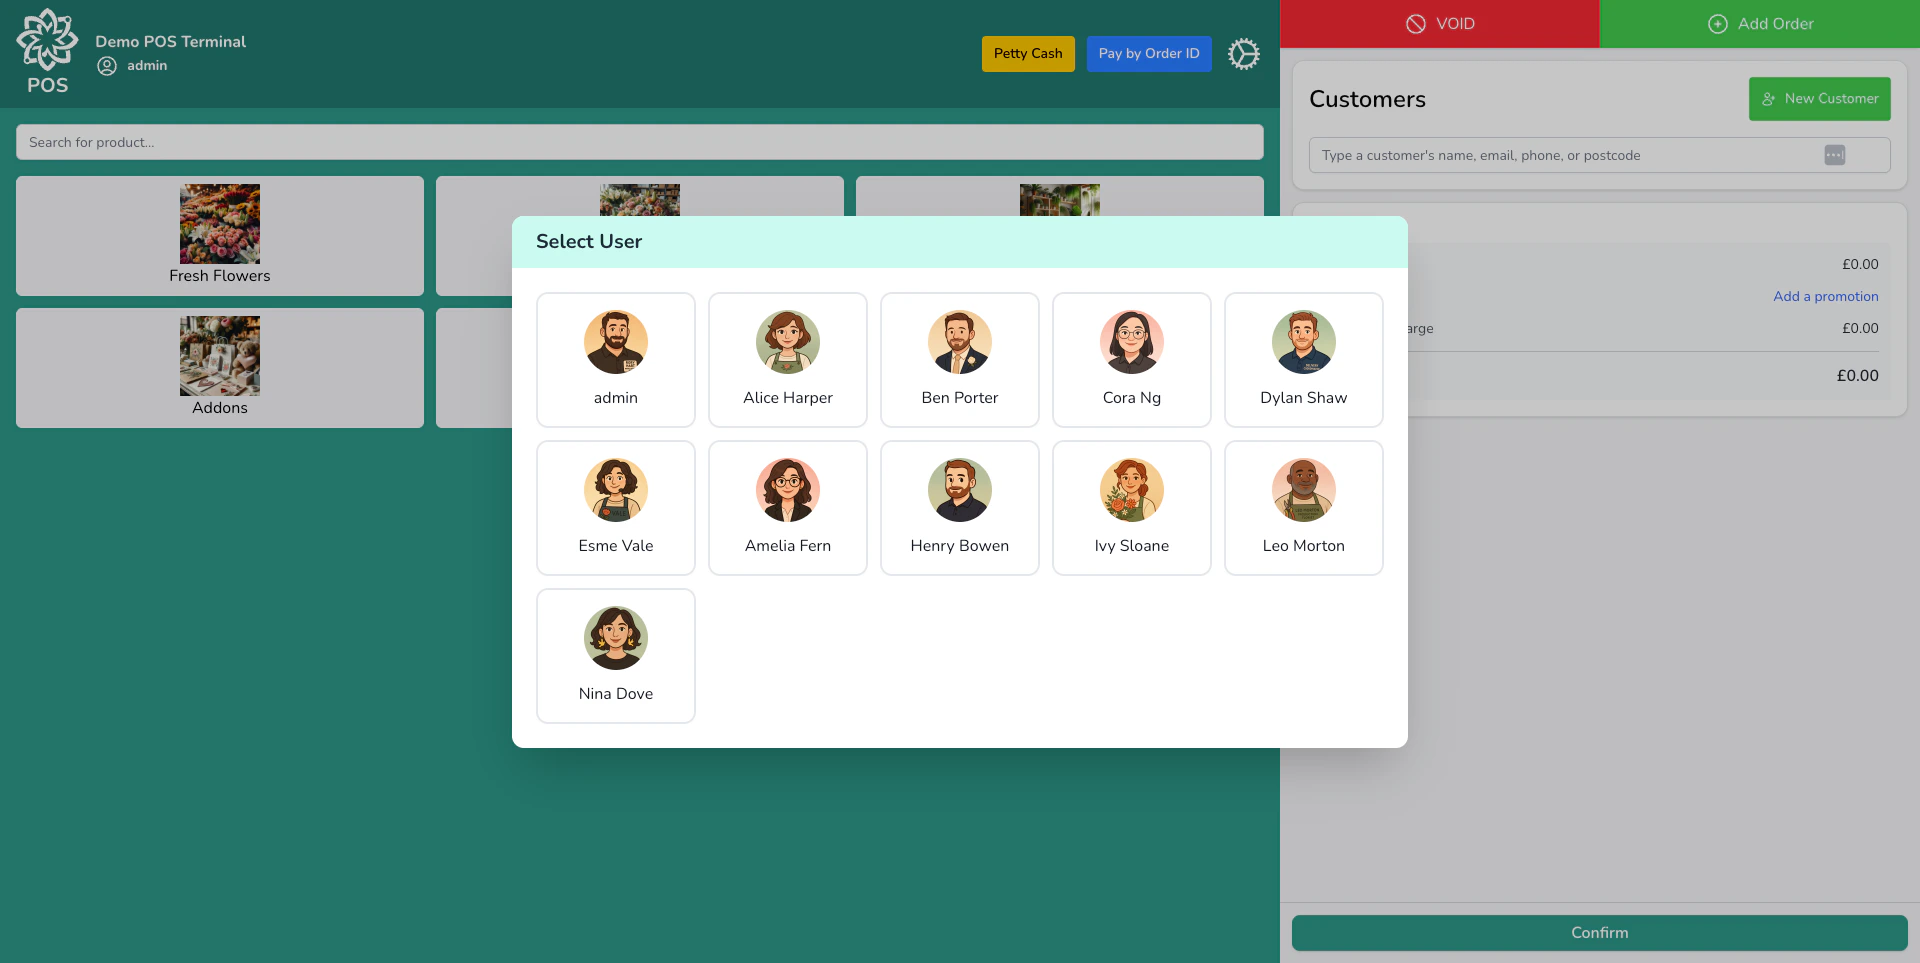 Count the cash already in the drawer. You can either:
* **Count by denomination** — enter the number of each coin and note (£1 coins, £5 notes, etc.) and the total is calculated for you. This is the most accurate method and speeds up your end-of-day count.
* **Enter a total** — if denomination counting is turned off for your shop, just type the total amount.
This is recorded as your **Opening Float**.
If you closed the till yesterday, your dashboard pre-fills the denomination counts from your last closing count — so you only need to adjust for any changes.
Click **Open Till** to begin. You're now ready to take payments.
## Browsing products
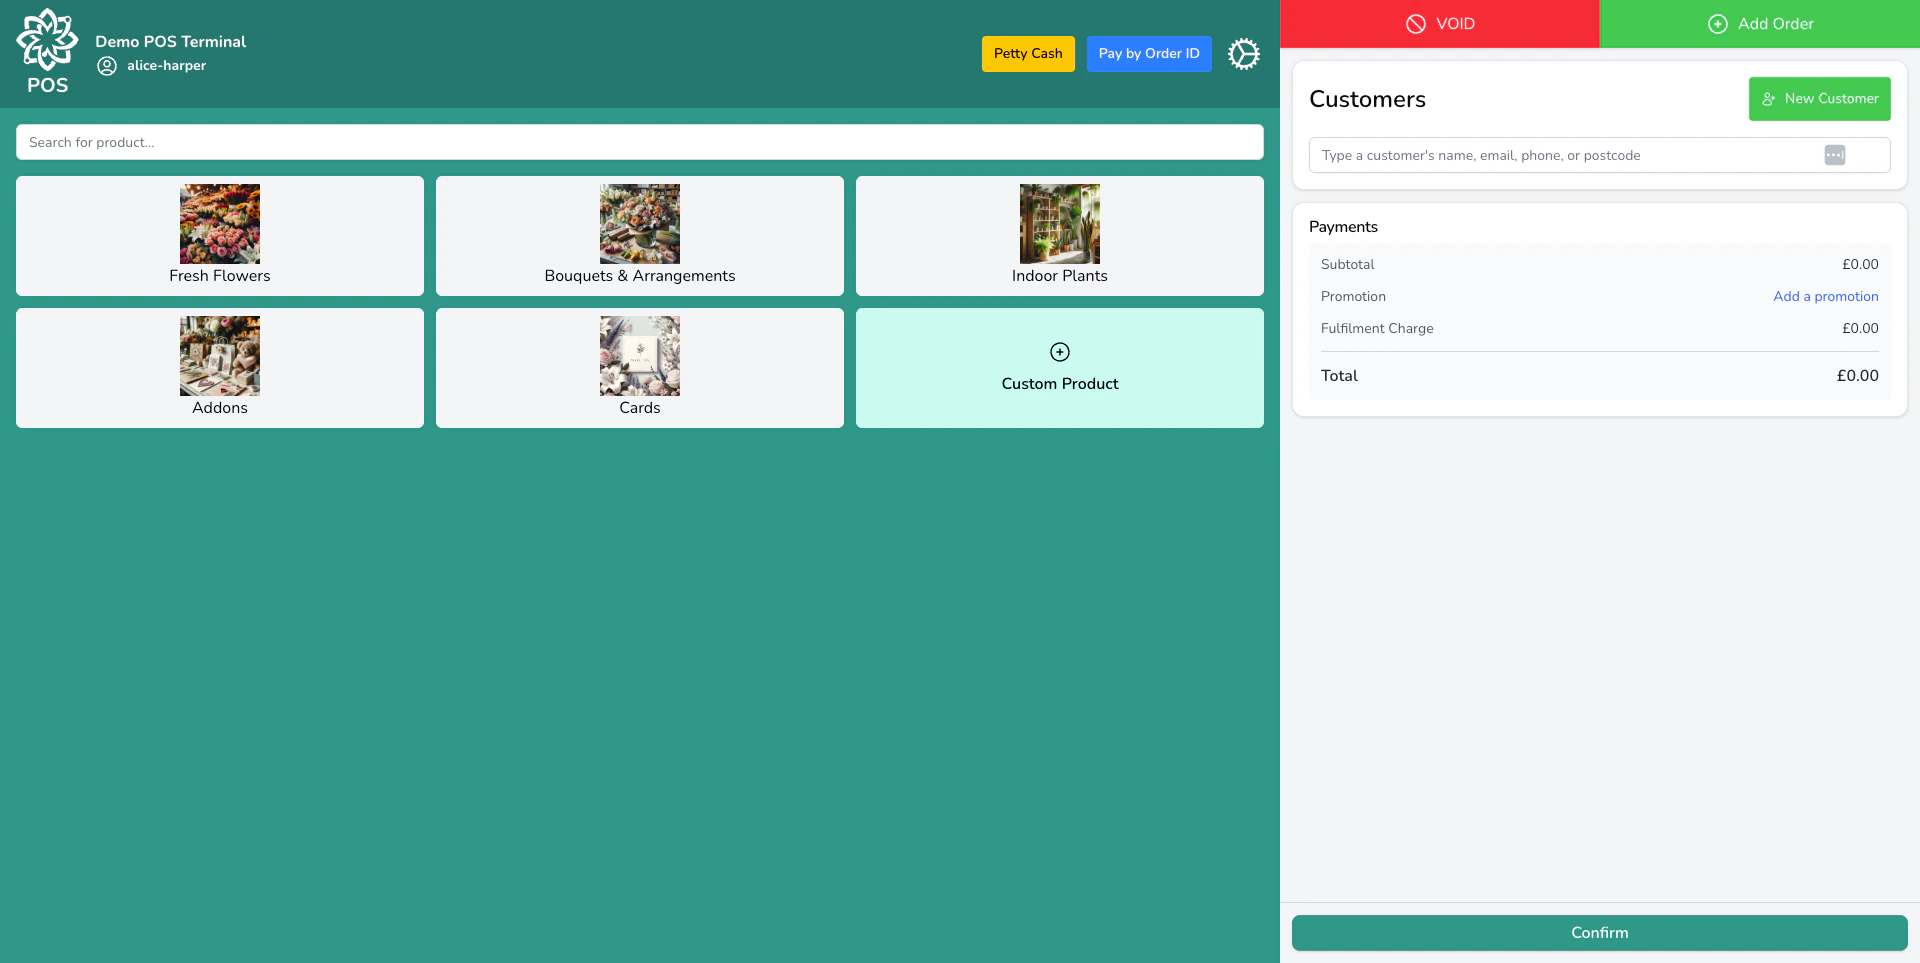
The left side of the POS shows your product catalogue. You can find products in several ways:
* **Tap a category** to browse (Bouquets, Plants, Add-ons, etc.)
* **Search** by product name using the search bar
* **Scan a barcode** with a USB barcode scanner — the product is added straight to the cart
* **Add a custom item** for anything not in your catalogue — just enter a name, price, and tax rate
When you tap a product that has **variants** (like Standard, Large, and Luxury), a selector appears showing each variant with its price and current stock level. Tap the one you want.
Count the cash already in the drawer. You can either:
* **Count by denomination** — enter the number of each coin and note (£1 coins, £5 notes, etc.) and the total is calculated for you. This is the most accurate method and speeds up your end-of-day count.
* **Enter a total** — if denomination counting is turned off for your shop, just type the total amount.
This is recorded as your **Opening Float**.
If you closed the till yesterday, your dashboard pre-fills the denomination counts from your last closing count — so you only need to adjust for any changes.
Click **Open Till** to begin. You're now ready to take payments.
## Browsing products
The left side of the POS shows your product catalogue. You can find products in several ways:
* **Tap a category** to browse (Bouquets, Plants, Add-ons, etc.)
* **Search** by product name using the search bar
* **Scan a barcode** with a USB barcode scanner — the product is added straight to the cart
* **Add a custom item** for anything not in your catalogue — just enter a name, price, and tax rate
When you tap a product that has **variants** (like Standard, Large, and Luxury), a selector appears showing each variant with its price and current stock level. Tap the one you want.
 ## Building the cart
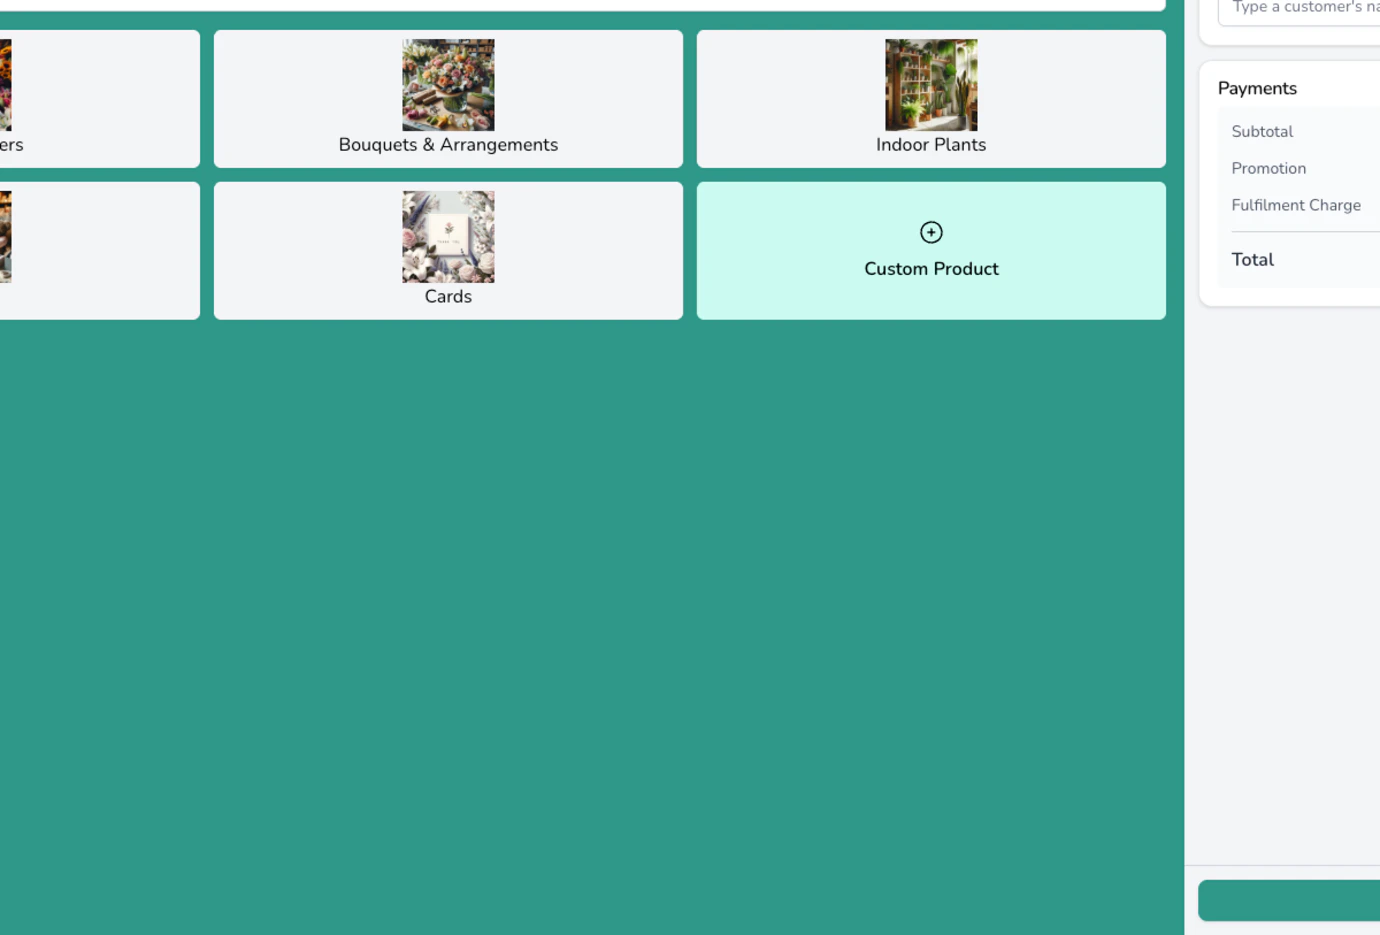
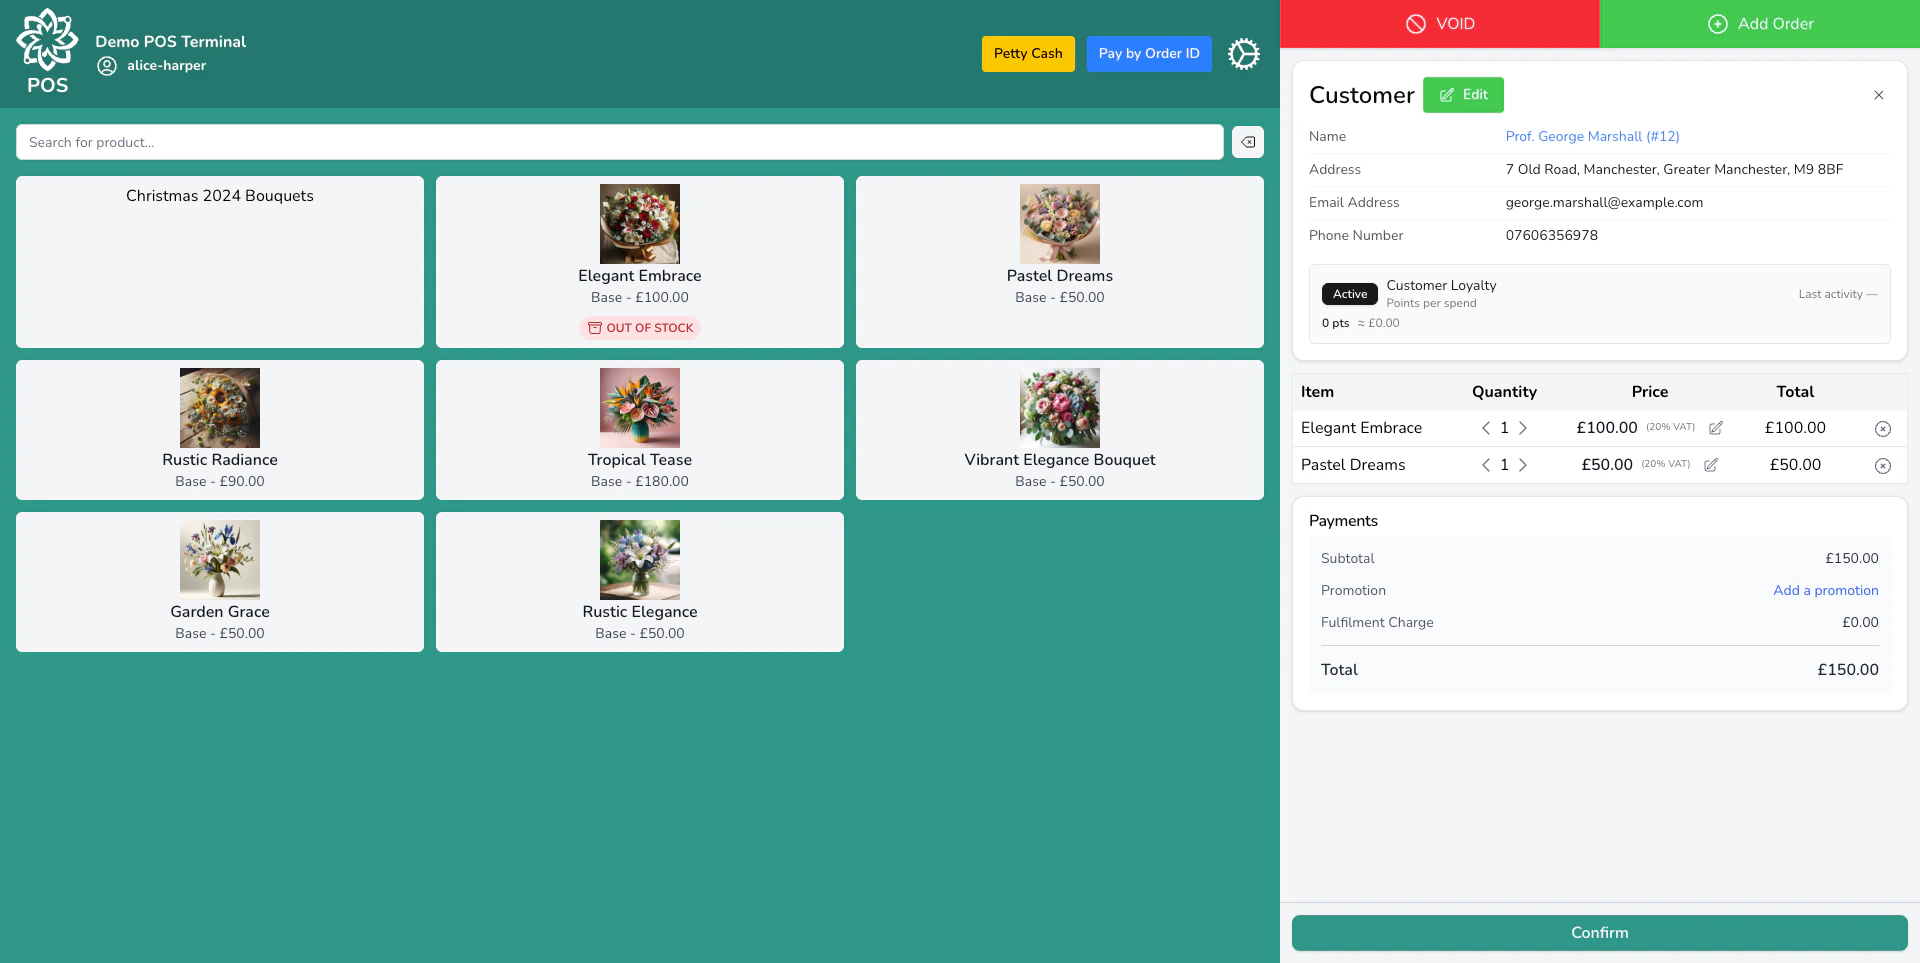
As you add products, they appear in the cart on the right side of the screen. From the cart, you can:
* **Change the quantity** — tap the quantity to adjust
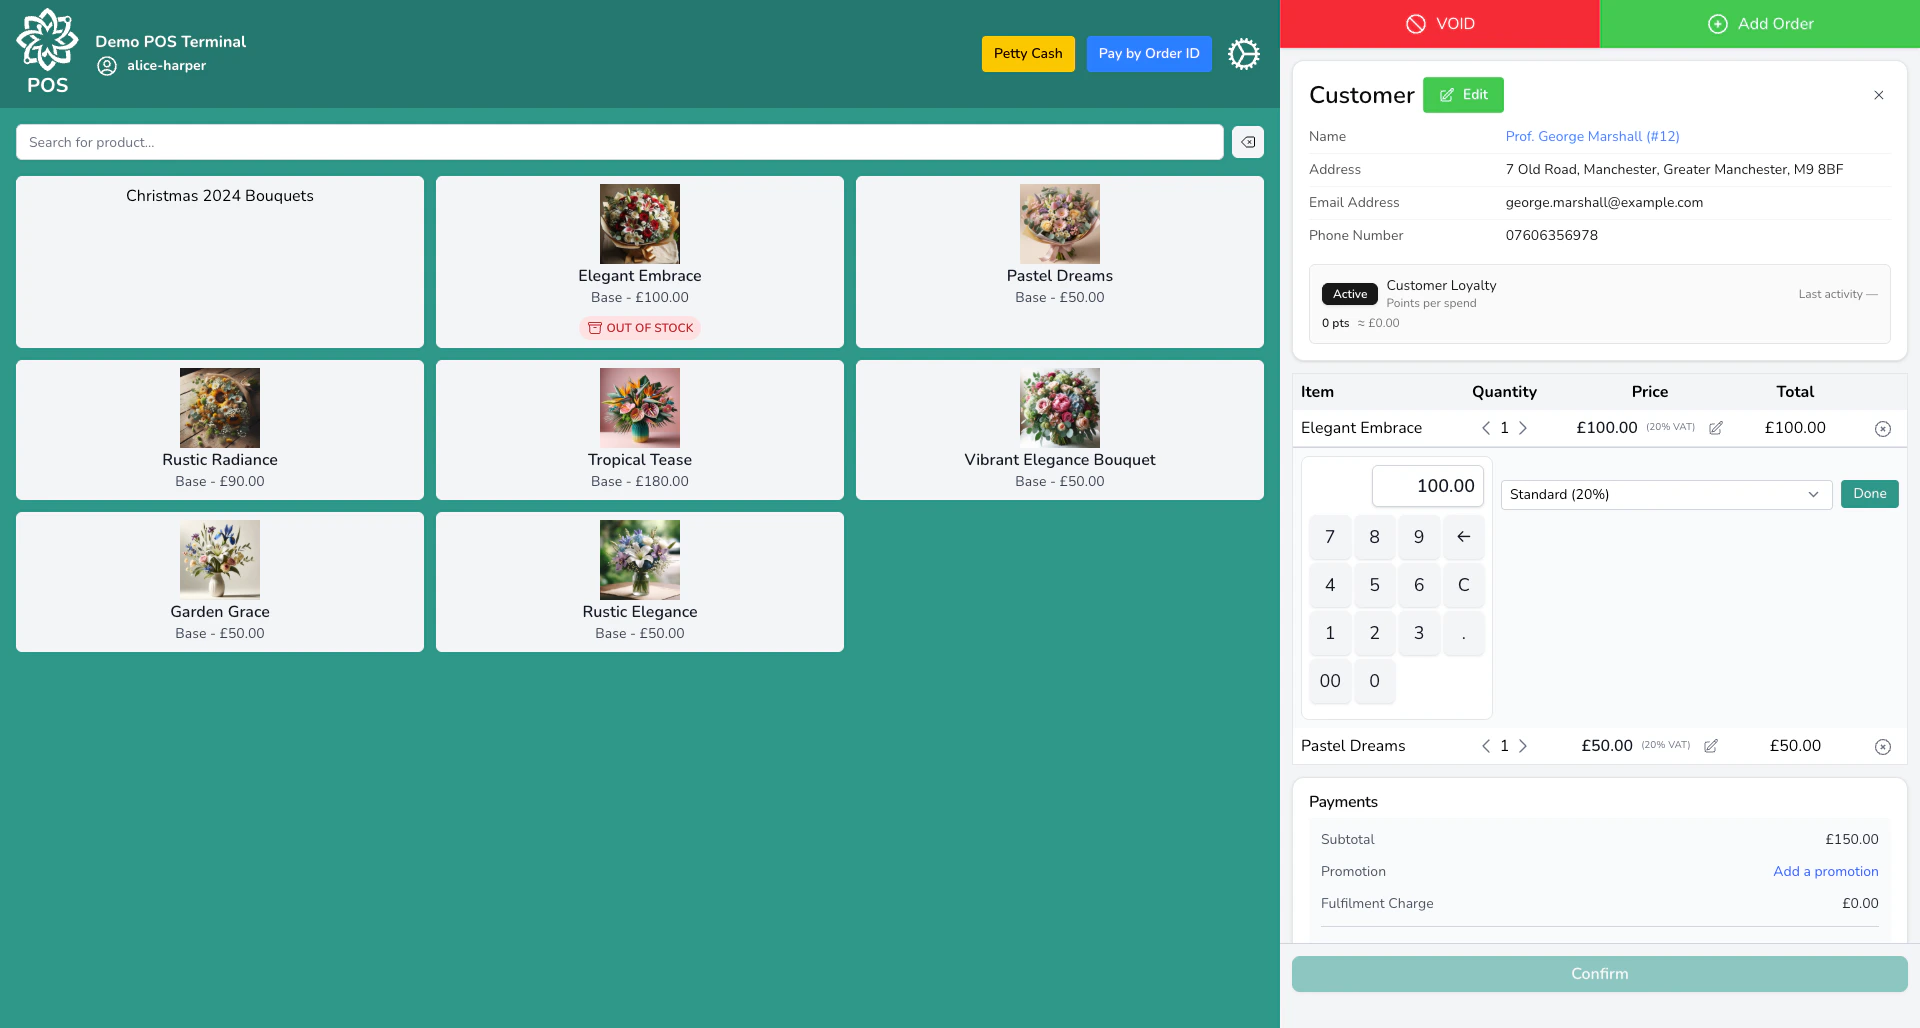
* **Edit the price** — tap the price to override it (useful for one-off discounts)
* **Remove an item** — swipe or click the remove button
* **Assign a customer** — link the sale to a customer profile for loyalty points, account payments, and purchase history
* **Apply a promotion** — browse available promotions and apply a discount code
## Building the cart
As you add products, they appear in the cart on the right side of the screen. From the cart, you can:
* **Change the quantity** — tap the quantity to adjust
* **Edit the price** — tap the price to override it (useful for one-off discounts)
* **Remove an item** — swipe or click the remove button
* **Assign a customer** — link the sale to a customer profile for loyalty points, account payments, and purchase history
* **Apply a promotion** — browse available promotions and apply a discount code
 ### Future-dated and multiple orders
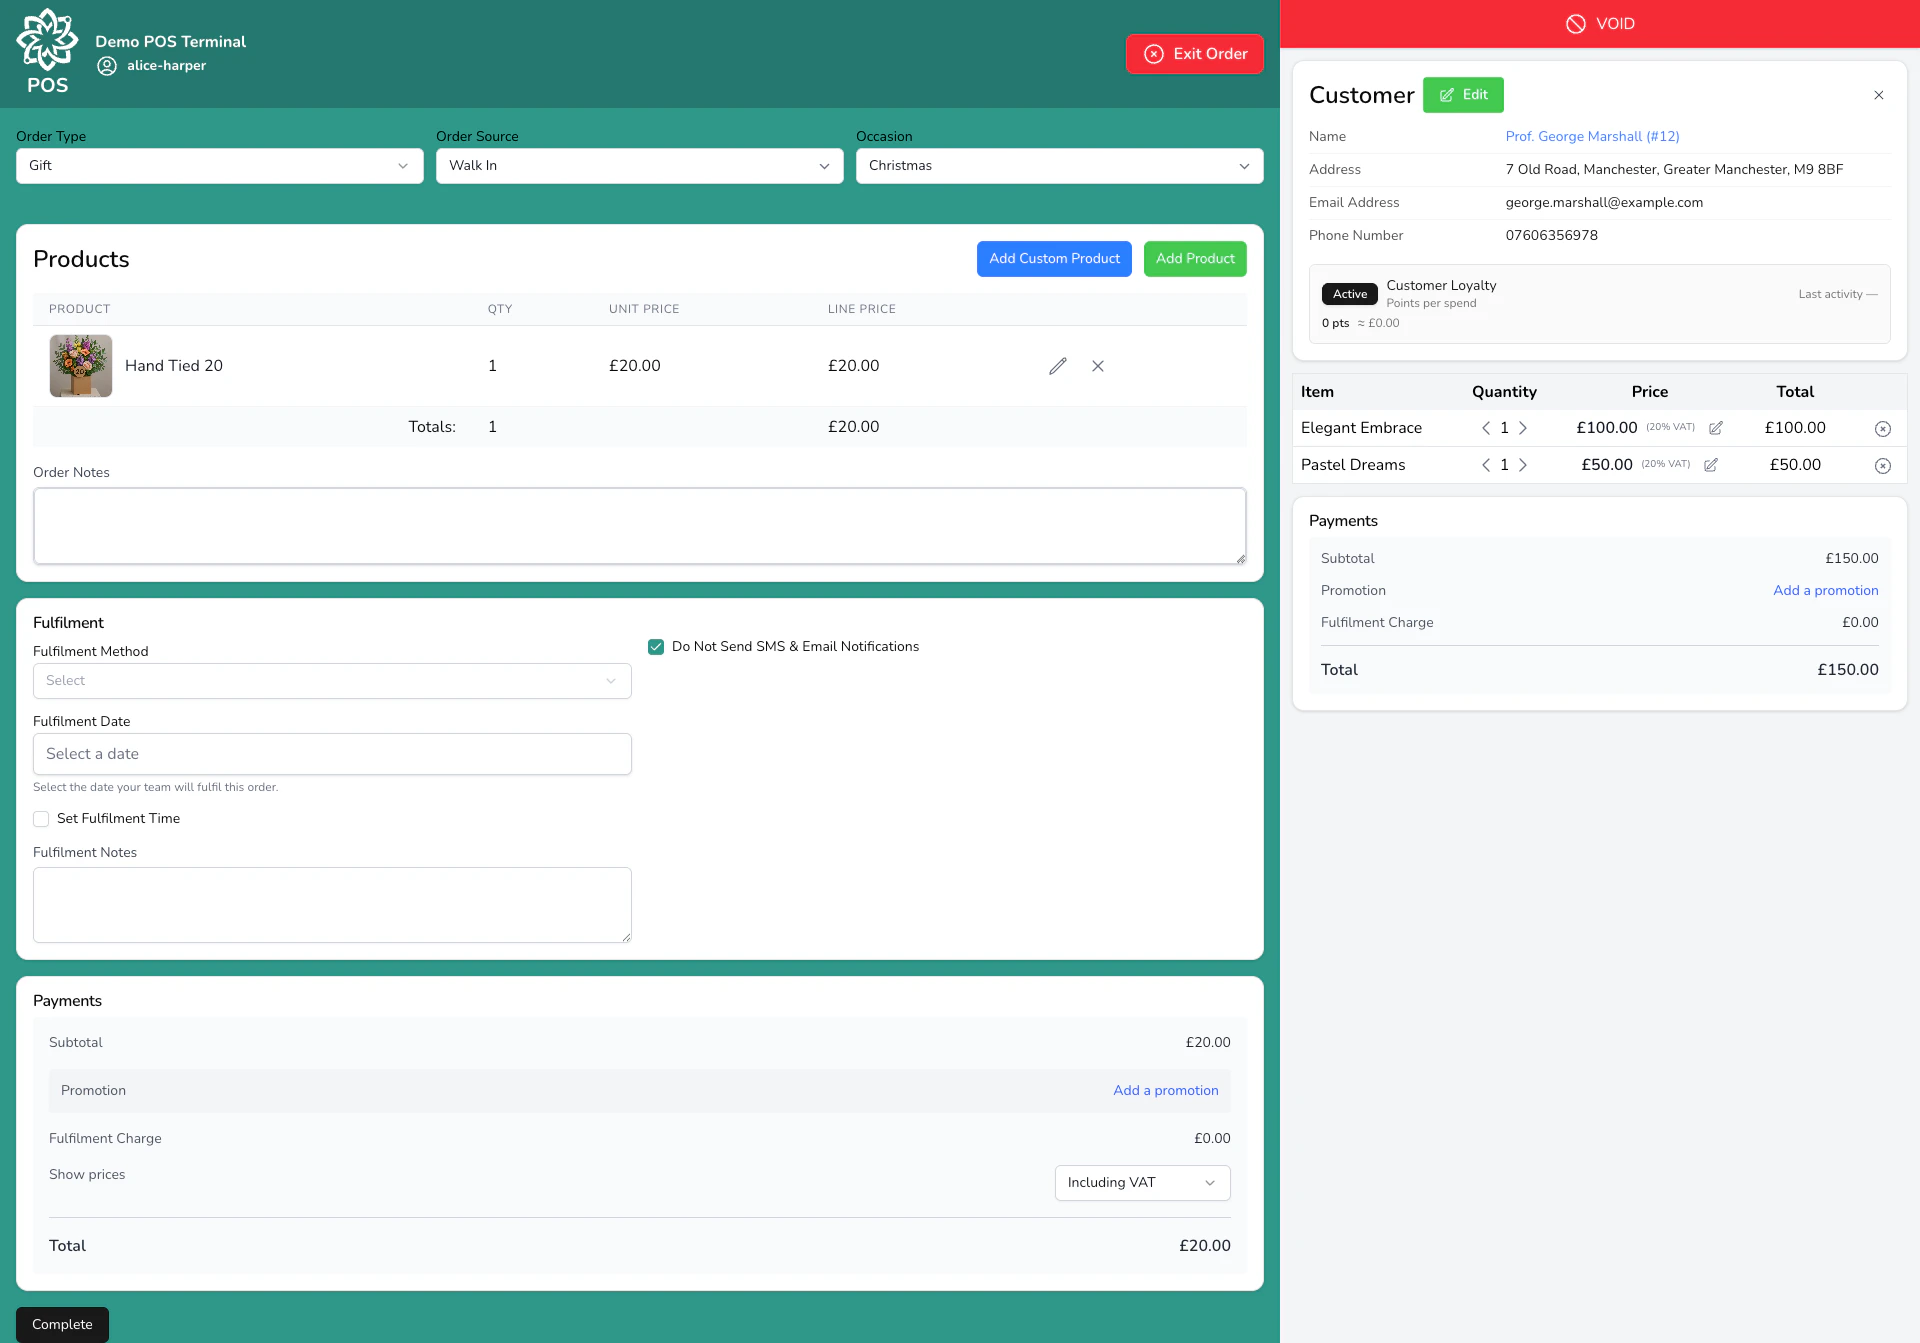
You can create orders for **future dates** from the POS — not just walk-in sales for today. If a customer wants to book a collection for next week, click **Add Order**, set the fulfilment date, and add the items. You can add **multiple orders for different dates and different addresses** in a single transaction — for example, a plant they're taking now, a bouquet for delivery to their mum next Friday, and an arrangement for collection the following week. Each order gets its own order number, but the customer pays once for everything.
POS-created orders land in your order management system as **Unconfirmed**, so your team picks them up in the usual queue and confirms them when they're ready.
## Taking payment
When the customer is ready to pay, tap **Confirm** to open the payment screen. The POS accepts cash, card, gift cards, account, and combinations. See [Payment Methods](/daily-operations/payment-methods) for what each method does, how card and account work, and how they're configured. Loyalty rewards apply as a discount **before** payment, not as a payment method.
### Cash
### Future-dated and multiple orders
You can create orders for **future dates** from the POS — not just walk-in sales for today. If a customer wants to book a collection for next week, click **Add Order**, set the fulfilment date, and add the items. You can add **multiple orders for different dates and different addresses** in a single transaction — for example, a plant they're taking now, a bouquet for delivery to their mum next Friday, and an arrangement for collection the following week. Each order gets its own order number, but the customer pays once for everything.
POS-created orders land in your order management system as **Unconfirmed**, so your team picks them up in the usual queue and confirms them when they're ready.
## Taking payment
When the customer is ready to pay, tap **Confirm** to open the payment screen. The POS accepts cash, card, gift cards, account, and combinations. See [Payment Methods](/daily-operations/payment-methods) for what each method does, how card and account work, and how they're configured. Loyalty rewards apply as a discount **before** payment, not as a payment method.
### Cash
 Use the **quick-cash buttons** (£5, £10, £20, £50) or type the cash tendered — the till works out the change. Tap **Exact due** when the customer has the right money.
### Gift cards
Enter the customer's gift card code and PIN. The balance is applied to the sale; if it doesn't cover the full amount, the card is fully redeemed and the remainder is paid by another method. To **sell** a gift card, add it to the cart like any other product.
### Split payments
Pay one order across multiple methods — gift card and card, deposit-by-link and the balance at the till, and so on. Apply each method against the remaining balance until it hits zero.
### Pay by Order ID
If a customer comes in to pay for a phone or website order, use **Pay by Order ID** instead of starting a new sale. Enter their **Order ID** — the POS shows the outstanding balance and links the payment to that order. Especially useful for **click-and-collect** — the customer placed the order online and pays when they pick it up.
### Paying for orders from the dashboard
You can also take payment for an order from the **order management dashboard** — click the pay button next to any order and it opens a payment session linked to your POS. The transaction reconciles in your till's [End of Day](/daily-operations/pos-end-of-day) report alongside walk-in sales.
## After the sale
Once payment is complete, you're asked whether to print a receipt. Tap **Print Receipt** to send it to your thermal printer, or skip the prompt.
Receipts can also go out by email automatically. When **Auto-Email Receipt When Paid** is turned on for your location (it's off by default — see [Locations](/settings/locations)), a receipt is emailed to the customer as soon as a sale is paid in full. Walk-in sales, customers without an email address, and customers who've opted out of notifications are skipped.
The completed sale is recorded as an order on your dashboard and appears in your reports.
Use the **quick-cash buttons** (£5, £10, £20, £50) or type the cash tendered — the till works out the change. Tap **Exact due** when the customer has the right money.
### Gift cards
Enter the customer's gift card code and PIN. The balance is applied to the sale; if it doesn't cover the full amount, the card is fully redeemed and the remainder is paid by another method. To **sell** a gift card, add it to the cart like any other product.
### Split payments
Pay one order across multiple methods — gift card and card, deposit-by-link and the balance at the till, and so on. Apply each method against the remaining balance until it hits zero.
### Pay by Order ID
If a customer comes in to pay for a phone or website order, use **Pay by Order ID** instead of starting a new sale. Enter their **Order ID** — the POS shows the outstanding balance and links the payment to that order. Especially useful for **click-and-collect** — the customer placed the order online and pays when they pick it up.
### Paying for orders from the dashboard
You can also take payment for an order from the **order management dashboard** — click the pay button next to any order and it opens a payment session linked to your POS. The transaction reconciles in your till's [End of Day](/daily-operations/pos-end-of-day) report alongside walk-in sales.
## After the sale
Once payment is complete, you're asked whether to print a receipt. Tap **Print Receipt** to send it to your thermal printer, or skip the prompt.
Receipts can also go out by email automatically. When **Auto-Email Receipt When Paid** is turned on for your location (it's off by default — see [Locations](/settings/locations)), a receipt is emailed to the customer as soon as a sale is paid in full. Walk-in sales, customers without an email address, and customers who've opted out of notifications are skipped.
The completed sale is recorded as an order on your dashboard and appears in your reports.
 ### Reprinting a receipt
Need to reprint a receipt after the sale? There are two ways:
* **From the POS** — tap the **settings cog**, go to **Transactions**, find the transaction, and tap the **print** button to reprint it.
* **From the order** — open the order on your dashboard and click **Print Receipt**. This prints the same receipt as the POS.
## Voiding a sale
If you need to cancel a sale before it's completed, you can **void** it from the cart — this removes all items and cancels the transaction. Voiding requires manager permission. See [Voiding a transaction](/daily-operations/transactions#voiding-a-transaction) for the full rules (and the difference between void and refund).
## POS settings
Click the **settings icon** in the POS to access quick actions and status information:
### Reprinting a receipt
Need to reprint a receipt after the sale? There are two ways:
* **From the POS** — tap the **settings cog**, go to **Transactions**, find the transaction, and tap the **print** button to reprint it.
* **From the order** — open the order on your dashboard and click **Print Receipt**. This prints the same receipt as the POS.
## Voiding a sale
If you need to cancel a sale before it's completed, you can **void** it from the cart — this removes all items and cancels the transaction. Voiding requires manager permission. See [Voiding a transaction](/daily-operations/transactions#voiding-a-transaction) for the full rules (and the difference between void and refund).
## POS settings
Click the **settings icon** in the POS to access quick actions and status information:
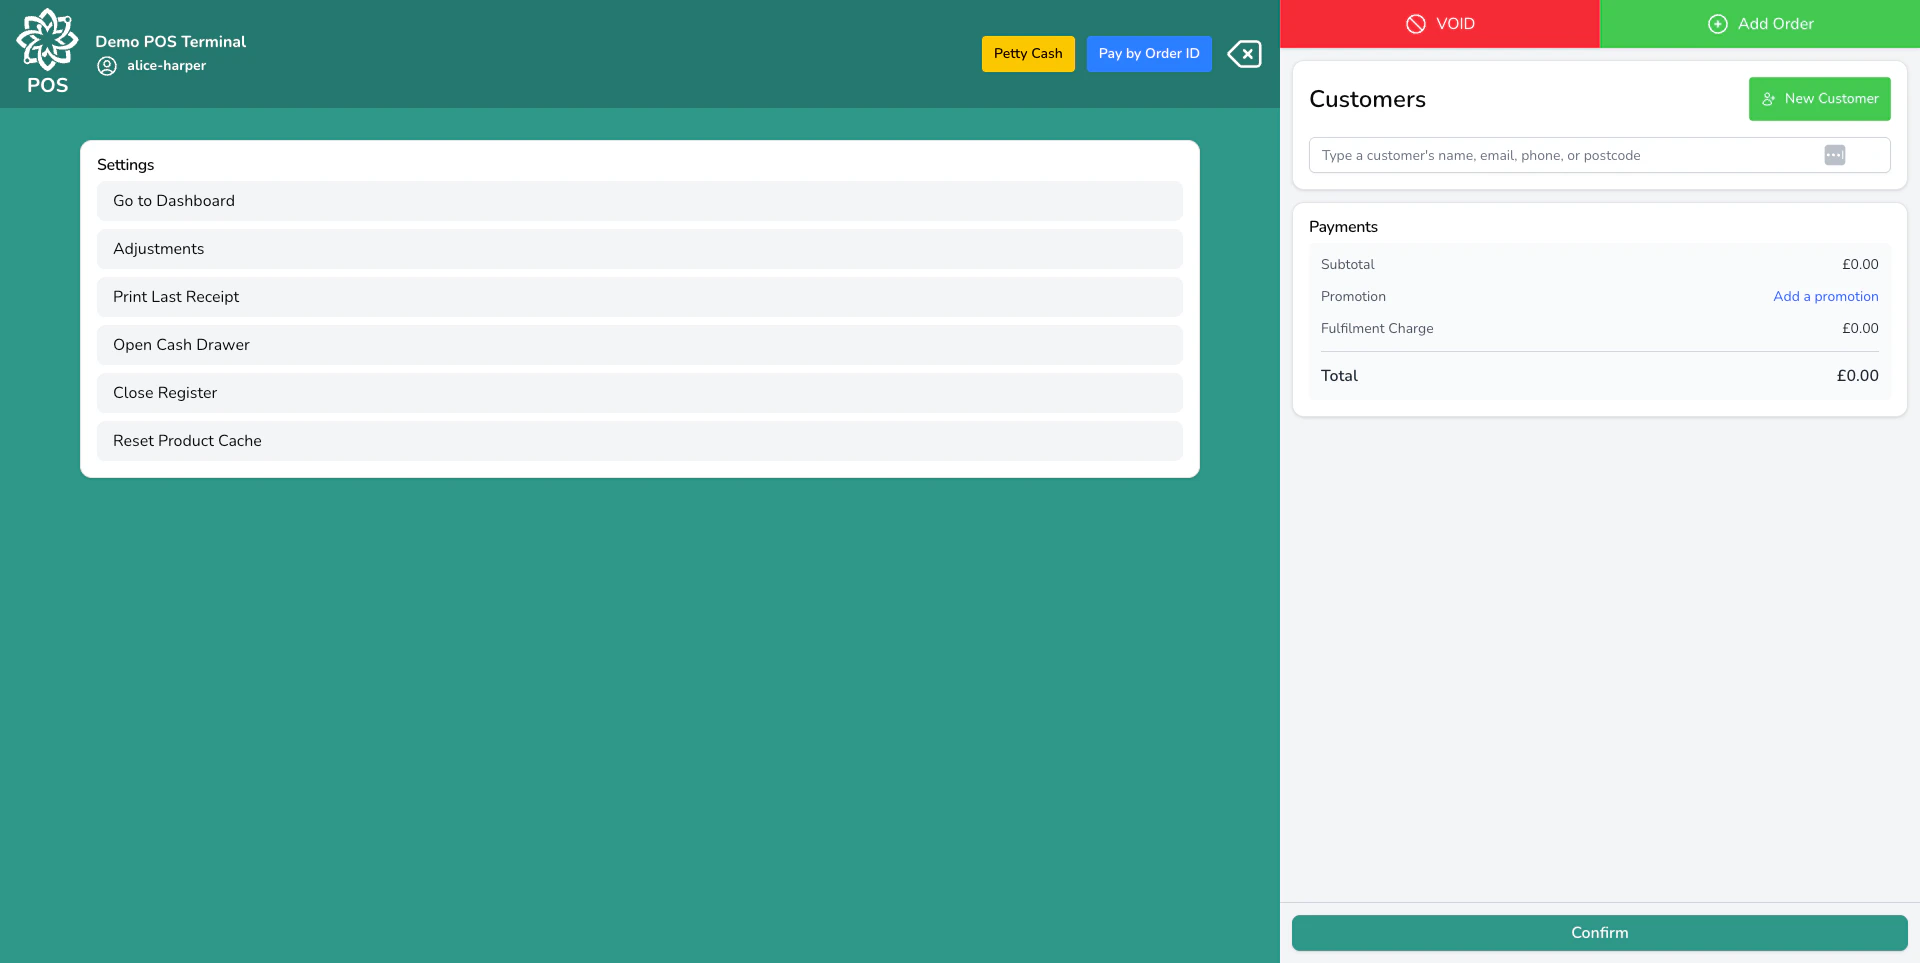 From here you can:
* **Close the register** — go to the [End of Day](/daily-operations/pos-end-of-day) screen
* **Open adjustments** — process [refunds](/daily-operations/refunds)
* **Go to dashboard** — leave the POS and return to your main dashboard
* **Open cash drawer** — trigger the drawer without a sale (useful for making change)
* **Check printer status** — see whether Digital Florists Connect is connected and which printer is active
## Common questions
Yes, if your shop runs paper-free — email receipts, card payments, little or no cash. Some shops work exactly that way. What a tablet can't do is print receipts, open a cash drawer, or print labels — those run through [Connect](/get-started/connect), which needs a Mac or Windows computer. See [Tablets as a till](/guides/hardware#tablets-as-a-till) for where the line is.
The POS requires an internet connection to process sales. If your connection drops, you won't be able to complete transactions until it's restored.
Each till session is tied to one device. If you have multiple tills, each one can have its own session with a different team member. You can also hand over a session to another user during a shift change.
Yes. Every POS sale creates an order, so it appears on your dashboard, in your reports, and in the customer's order history.
Yes. Gift cards are products in your catalogue. Add one to the cart, take payment, and a gift card code is generated automatically. See [Gift Cards](/settings/gift-cards) for setup.
Use the **custom item** option to add a one-off product with a name, price, and tax rate. This is handy for selling something you don't normally stock.
## What's next?
Every payment method and how they work.
Process refunds by order, transaction, or ad-hoc.
Close your till and review the day's takings.
Register and manage your POS devices.
From here you can:
* **Close the register** — go to the [End of Day](/daily-operations/pos-end-of-day) screen
* **Open adjustments** — process [refunds](/daily-operations/refunds)
* **Go to dashboard** — leave the POS and return to your main dashboard
* **Open cash drawer** — trigger the drawer without a sale (useful for making change)
* **Check printer status** — see whether Digital Florists Connect is connected and which printer is active
## Common questions
Yes, if your shop runs paper-free — email receipts, card payments, little or no cash. Some shops work exactly that way. What a tablet can't do is print receipts, open a cash drawer, or print labels — those run through [Connect](/get-started/connect), which needs a Mac or Windows computer. See [Tablets as a till](/guides/hardware#tablets-as-a-till) for where the line is.
The POS requires an internet connection to process sales. If your connection drops, you won't be able to complete transactions until it's restored.
Each till session is tied to one device. If you have multiple tills, each one can have its own session with a different team member. You can also hand over a session to another user during a shift change.
Yes. Every POS sale creates an order, so it appears on your dashboard, in your reports, and in the customer's order history.
Yes. Gift cards are products in your catalogue. Add one to the cart, take payment, and a gift card code is generated automatically. See [Gift Cards](/settings/gift-cards) for setup.
Use the **custom item** option to add a one-off product with a name, price, and tax rate. This is handy for selling something you don't normally stock.
## What's next?
Every payment method and how they work.
Process refunds by order, transaction, or ad-hoc.
Close your till and review the day's takings.
Register and manage your POS devices.