Tasks help you keep track of everything that needs doing around the shop — flower prep, admin jobs, cleaning, phone calls, and anything else. Create tasks, assign them to team members, set due dates and priorities, and track progress with checklists.Tasks appear on your Dashboard alongside orders, so your team can see their work for the day in one place. For jobs that happen on a regular schedule, set them up as recurring tasks.
On the Dashboard — tasks show alongside orders in the main table and in the dedicated Tasks tab. Use the date filters to see tasks due today, tomorrow, or any date you choose.
In the Tasks calendar — a monthly or daily overview of all tasks across your team.
On the Digital Florists App — your team can view tasks on their phone, with filters to focus on tasks assigned to them. See the florist app guide.
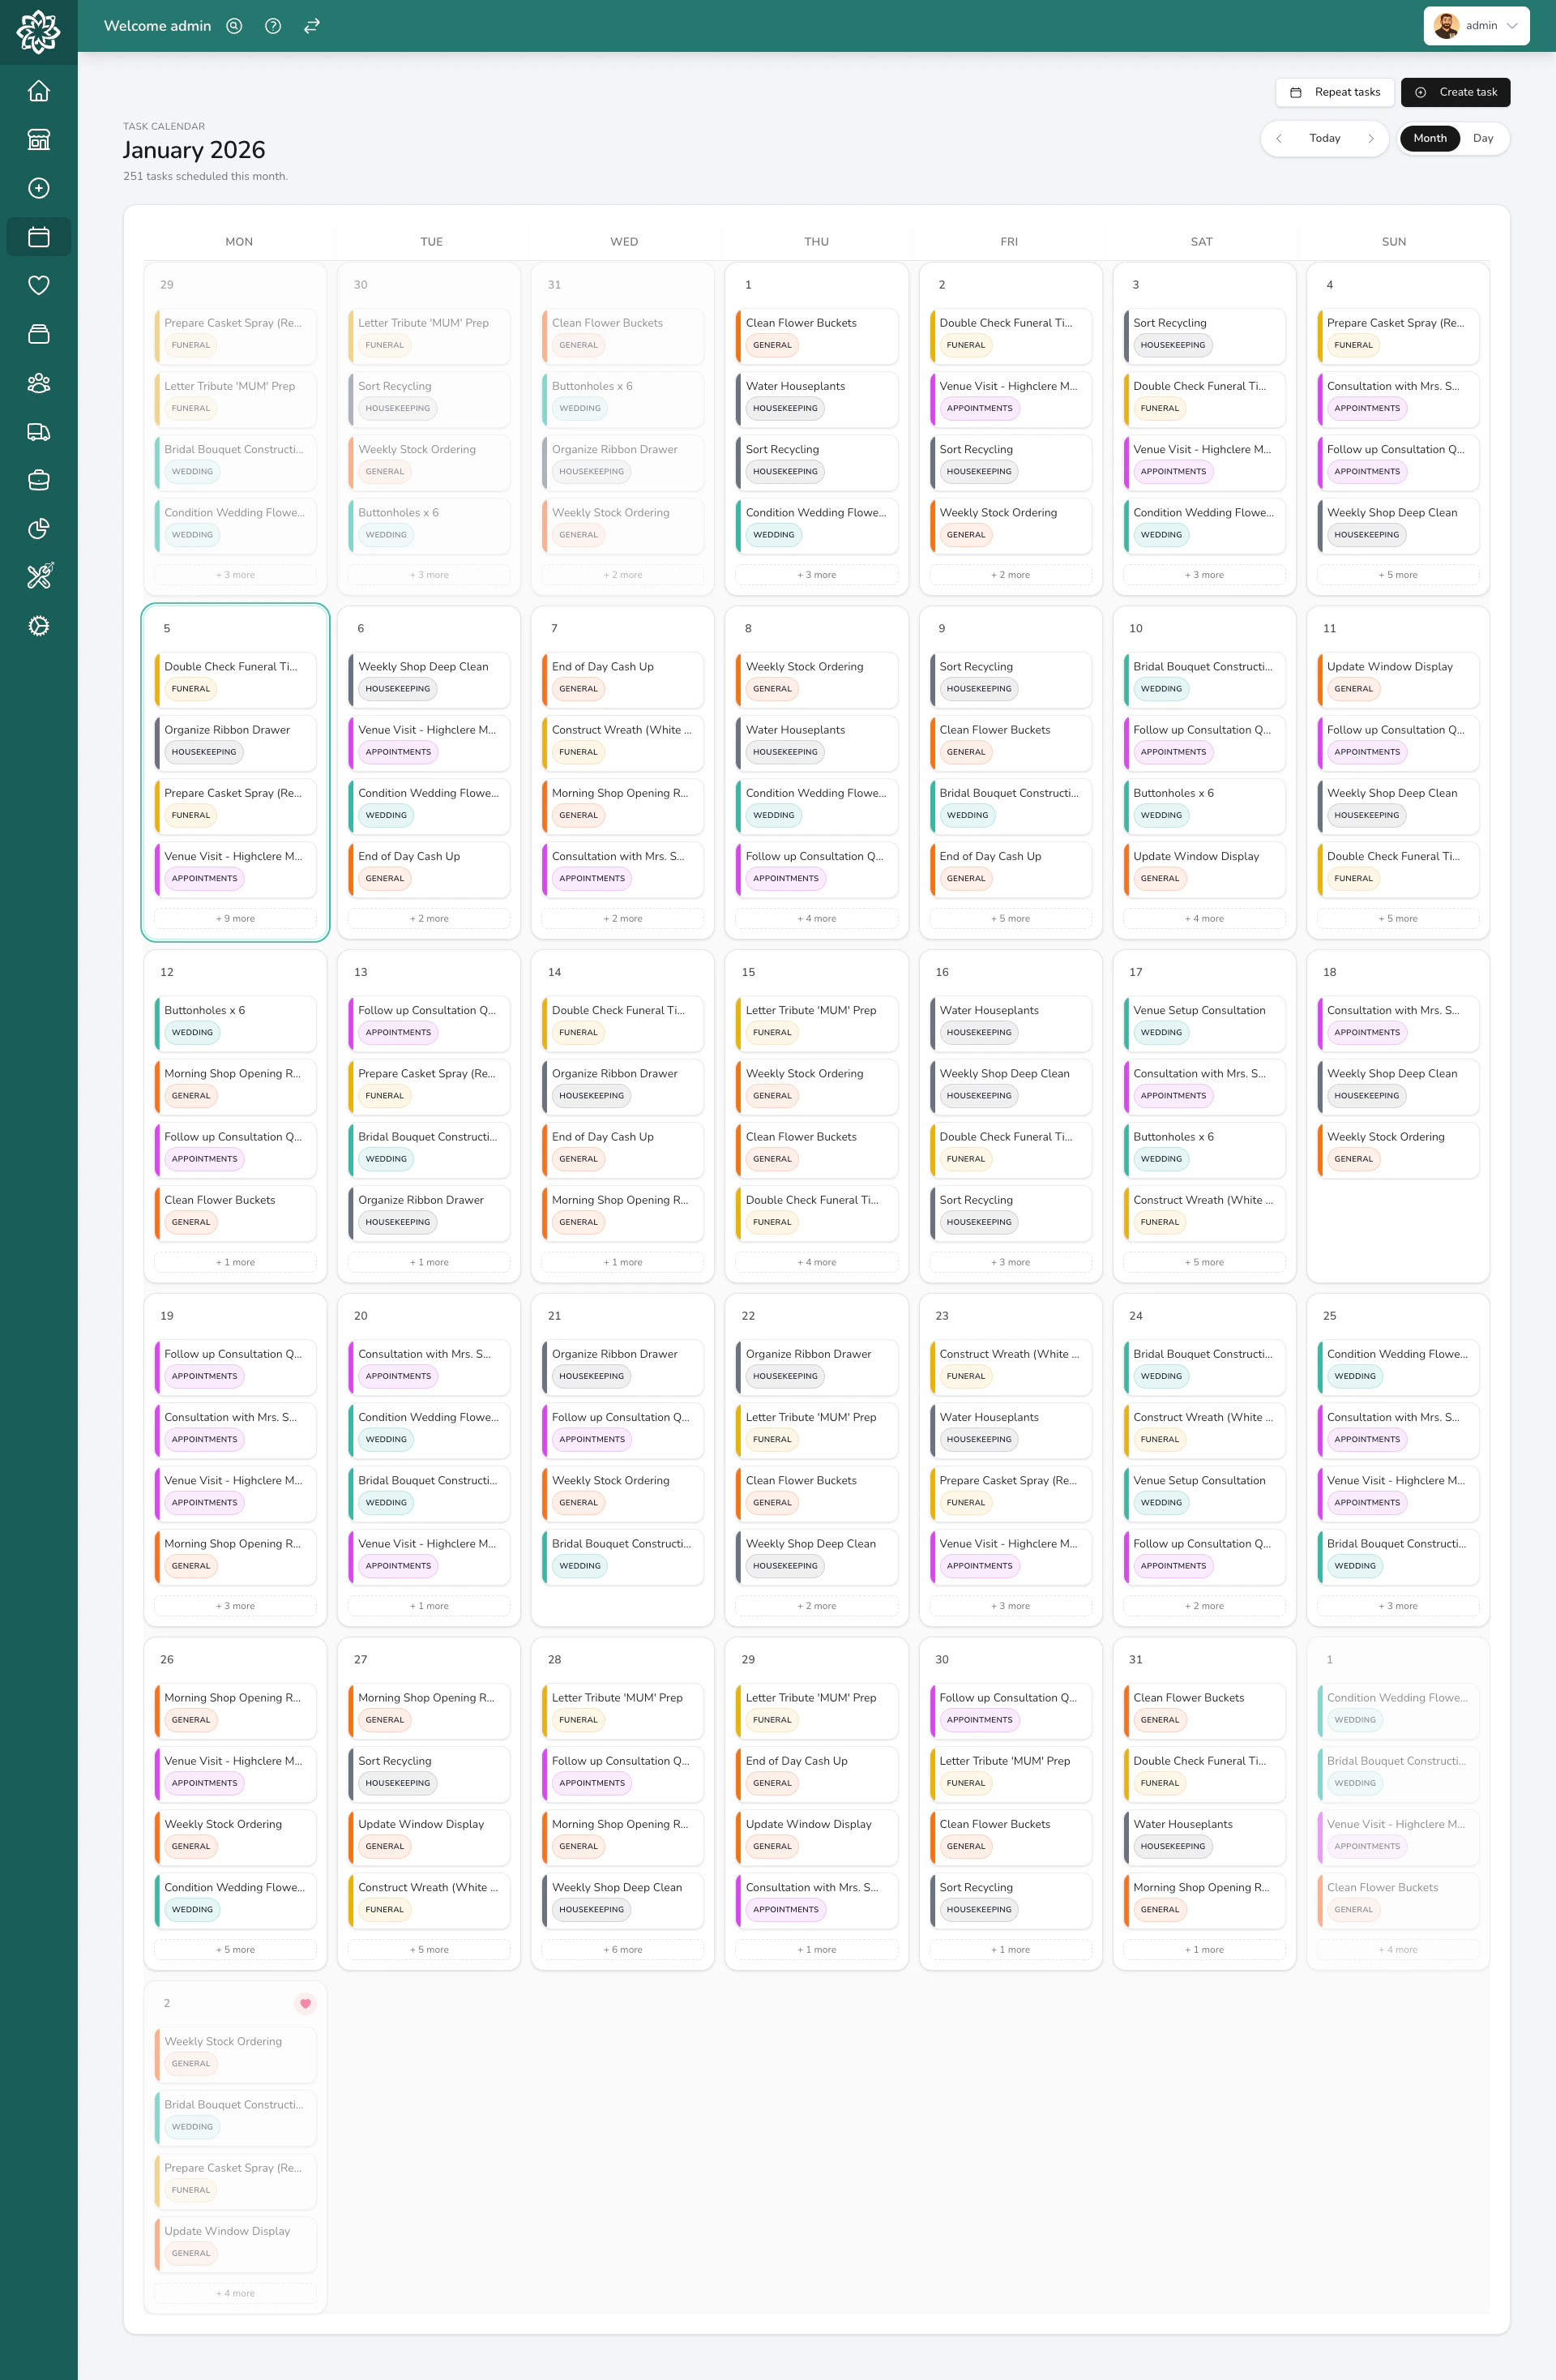
Monthly calendar view
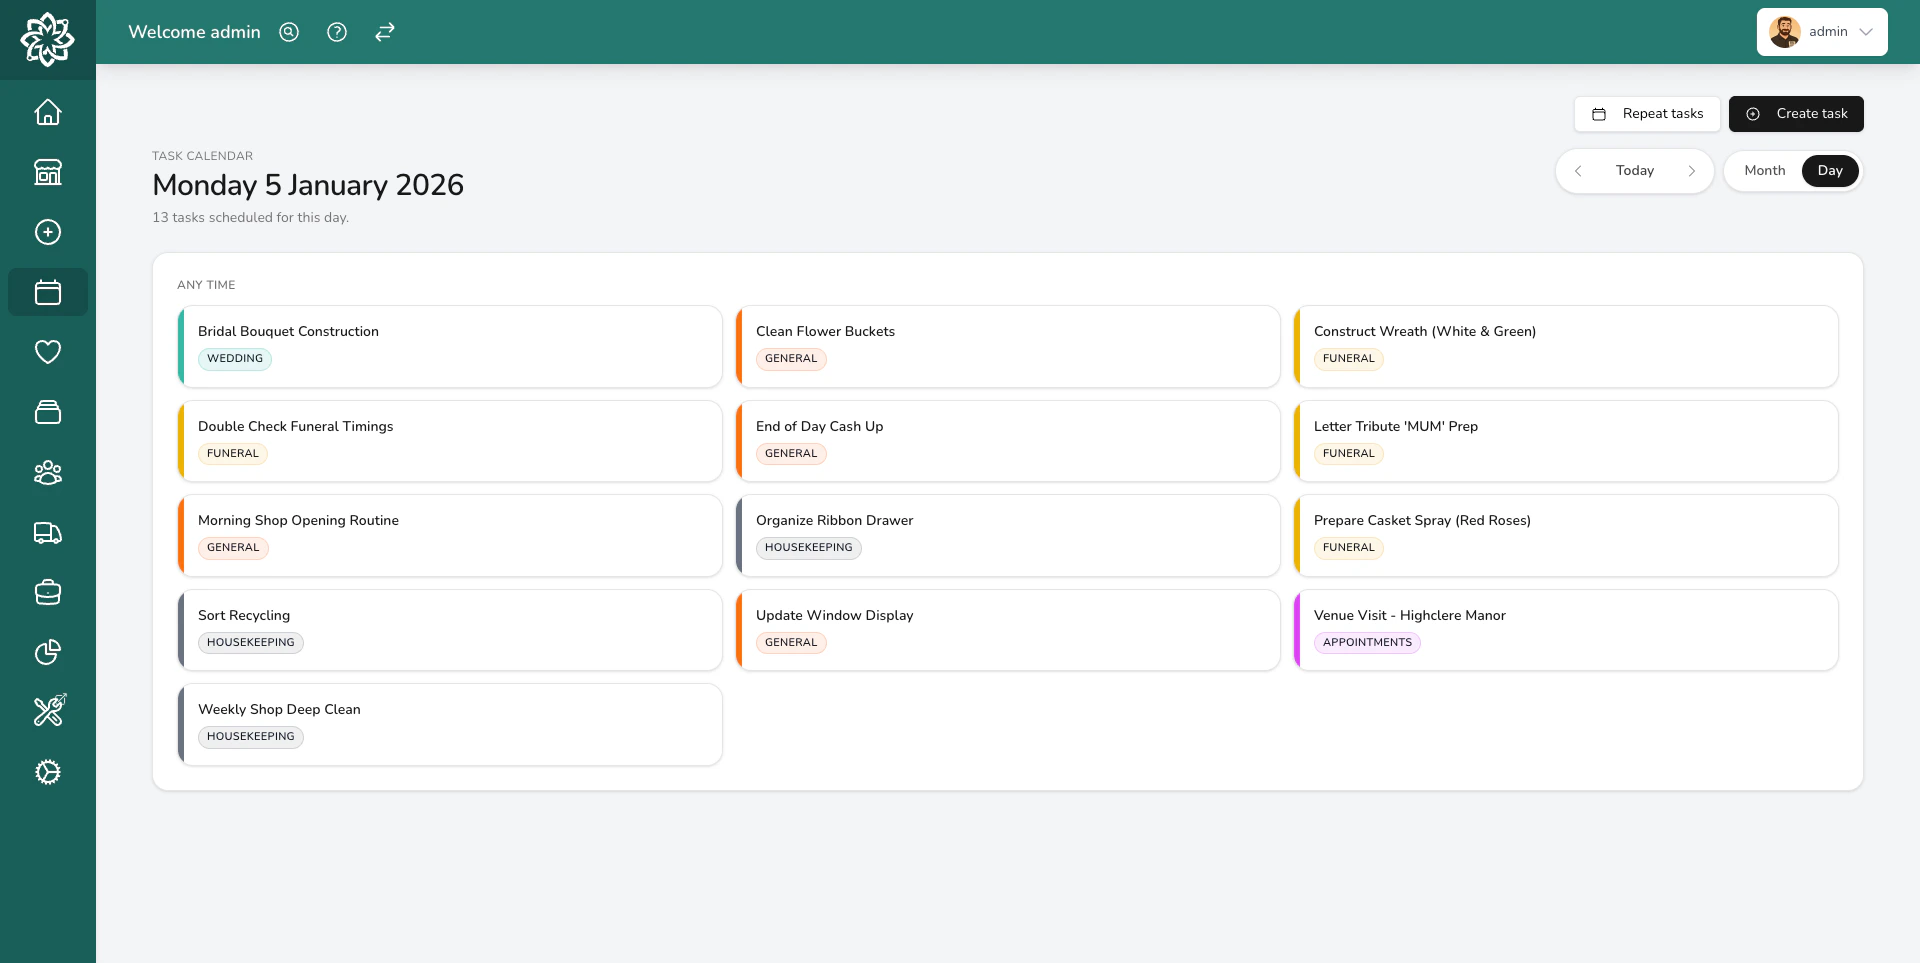
Switch to the daily view to see individual tasks with their details, priority, and assignees.
Creating, editing, assigning, and deleting tasks requires the Tasks (Manage) permission. Managers and Admins have this by default; your administrator can adjust who has it in Settings > Team.
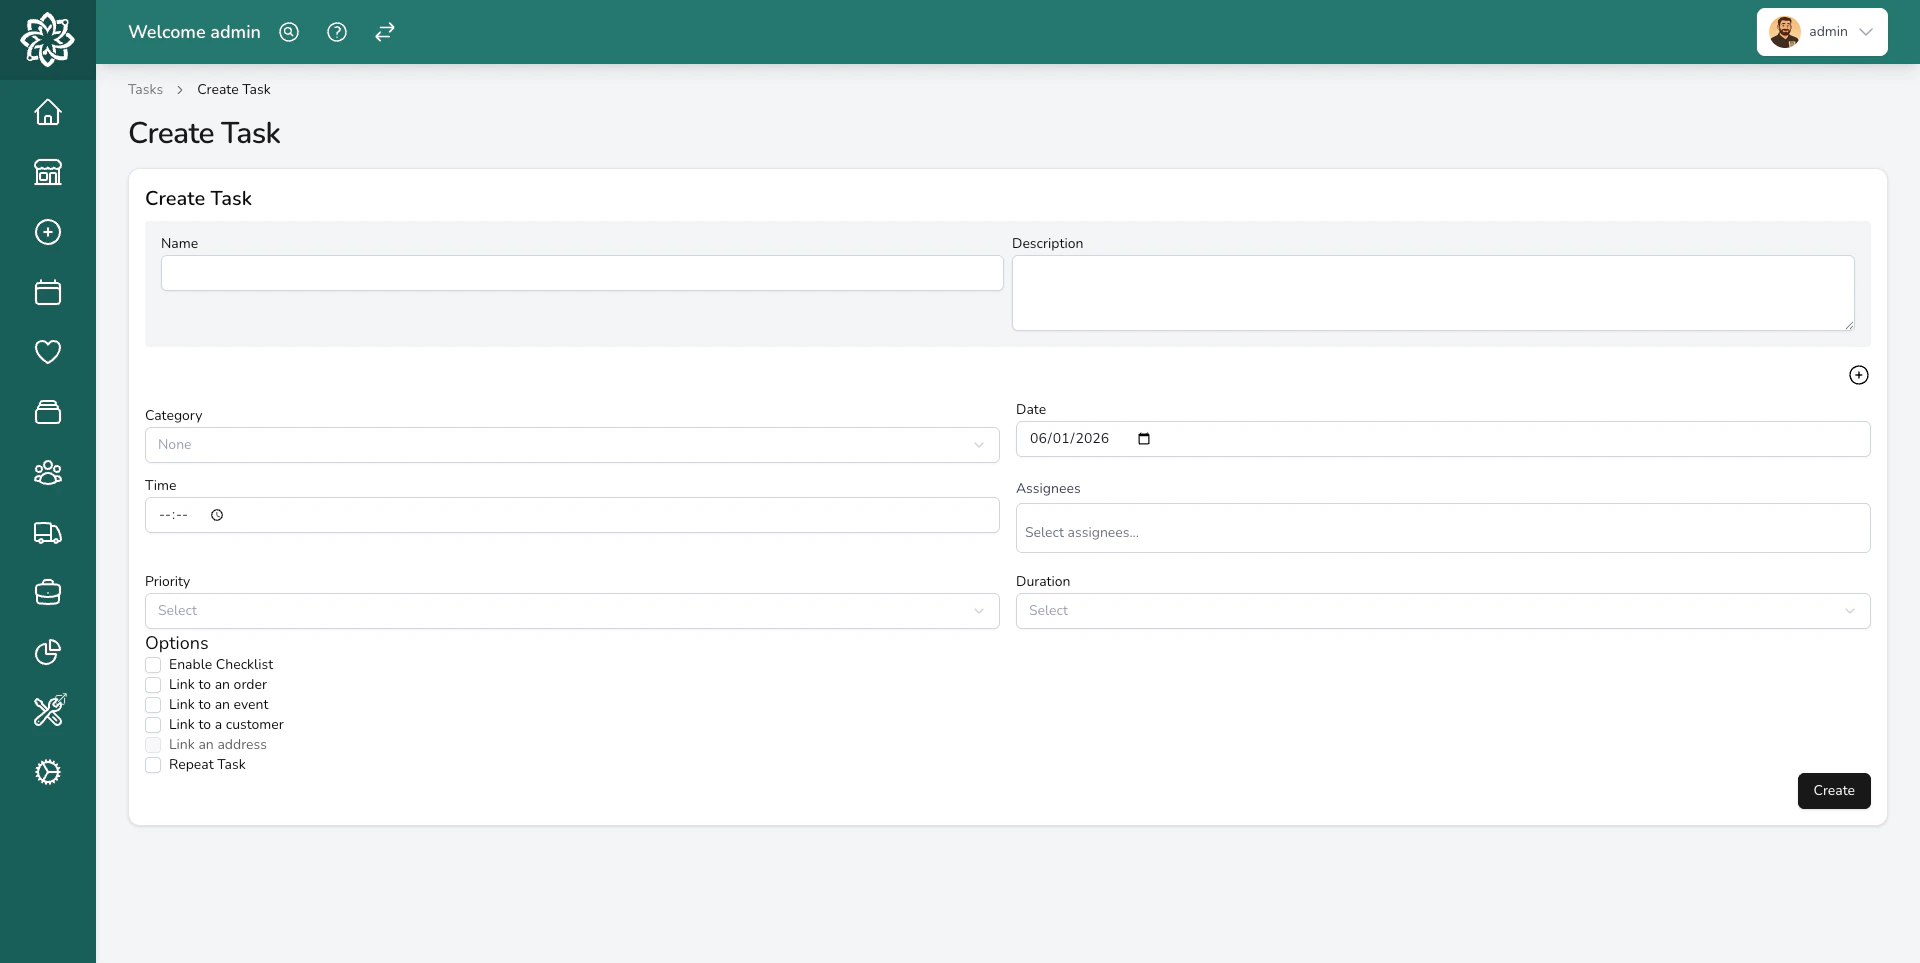
The task creation form
1
Enter the details
Give the task a name (what needs doing), a due date and optional time. Set a priority — Urgent down to Low — to help your team see what to grab first.You can also set a duration if you want to track how long the task should take (from 5 minutes up to 6 hours).
2
Assign it
Choose one or more team members to be responsible for the task. You can assign multiple people — for example, two florists working on a large wedding order together. Leave it unassigned if anyone on the team can pick it up.
3
Pick a category
Choose a category — Digital Florists comes with five defaults (General, Funeral, Wedding, Housekeeping, Appointments) that you can rename and recolour. Manage them in Settings > Tasks.
4
Add a description or checklist
Add a description for extra context. For bigger jobs, enable the checklist to break it into smaller steps.
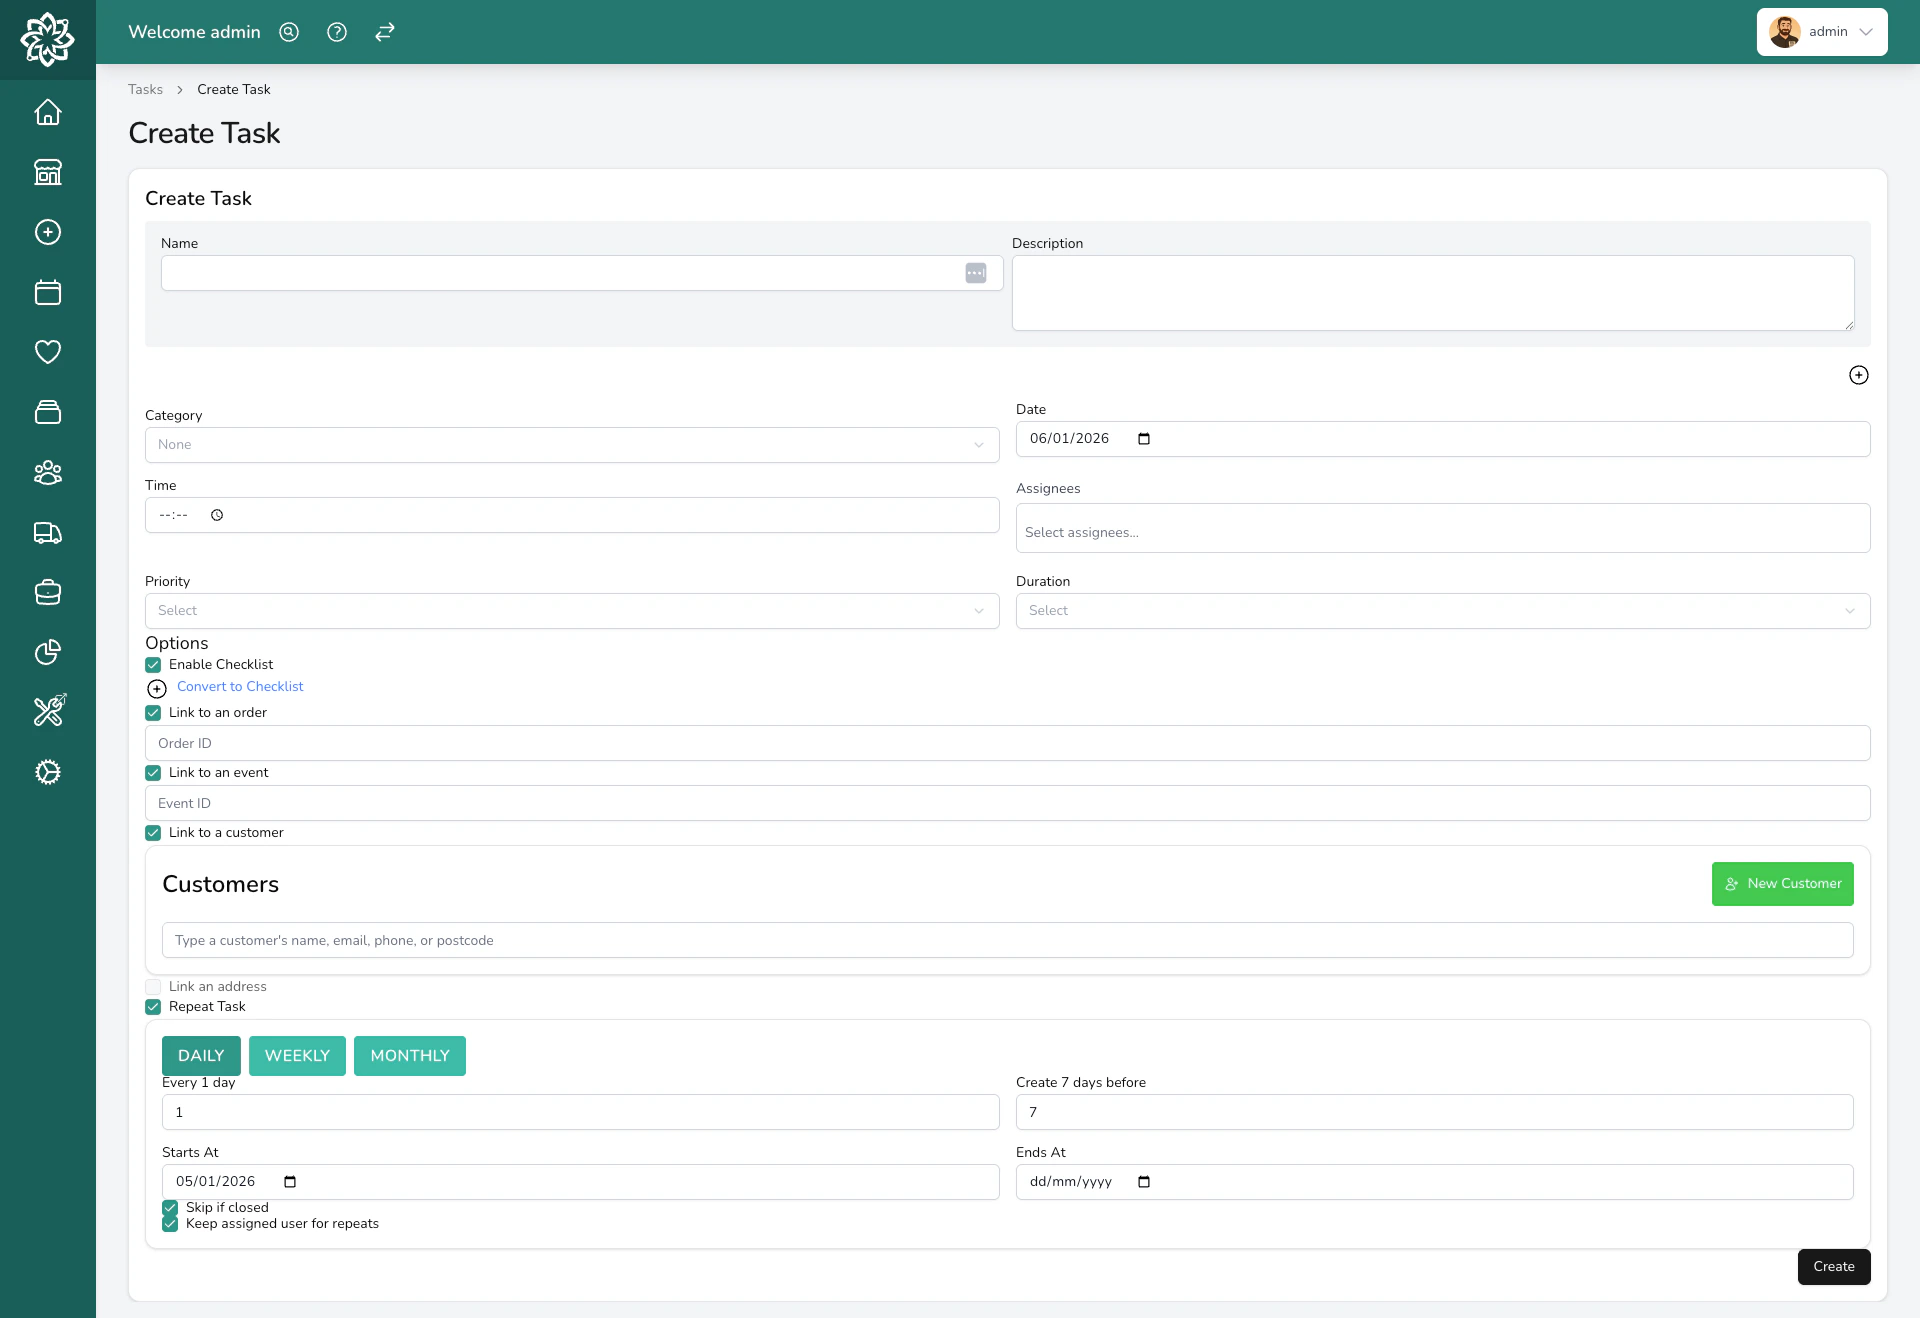
A filled-out task form
5
Link it (optional)
Link the task to an order, customer, event, or address so your team can jump straight to the related item. This is optional — tasks work fine on their own.
You can create multiple tasks at once. Click the + button on the task name field to add more tasks — they’ll all share the same due date, category, and assignees.
Not started yet. This is the default when a task is created.
In Progress
Someone has started working on it.
Completed
Done. The task records who completed it and when.
Cancelled
The task has been cancelled — for example, automatically when its linked order is cancelled.
You can change a task’s status from the dashboard, the task detail view, or the mobile app. On the dashboard, use the Start and Done buttons for quick status changes.
If you complete a task that hasn’t been started or assigned, Digital Florists records you as the person who did it.
Within a single task’s checklist, you can tick off multiple items at once — useful for closing out a long checklist at the end of a busy day.Bulk checklist actions need the Tasks (Manage) permission.
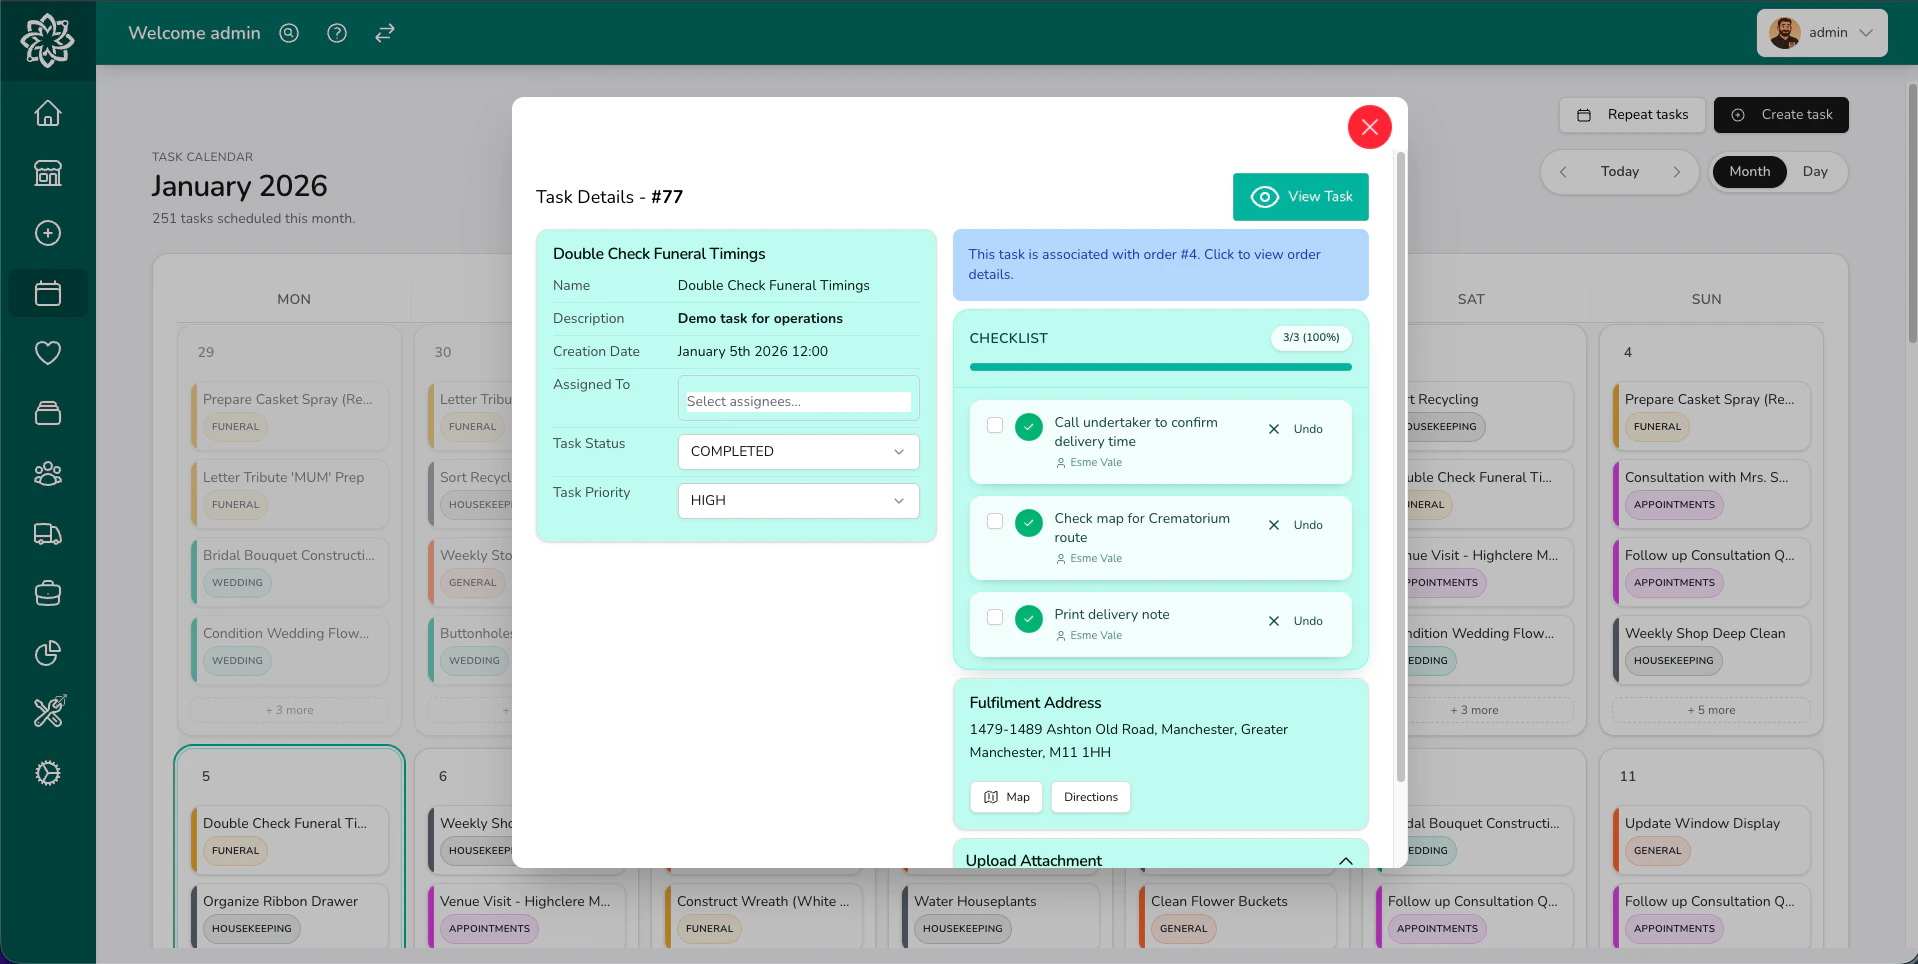
For tasks with multiple steps, enable the checklist. Each item can be ticked off individually, and you’ll see a progress bar showing how far through the list you are.
A task with a checklist showing progress
This is useful for things like:
“Set up shop floor” — displays, signage, stock replenishment
“Prepare for wedding consultation” — samples, portfolio, quote template
“End of day” — cleaning, stock check, cash up, lock up
Each checklist item tracks who completed it, so you know which team member did what. You can also bulk-assign checklist items to a specific person.
Completing all checklist items doesn’t automatically mark the task as done — you still need to close the task itself.
You can upload images to a task — reference photos, inspiration images, or photos of completed work. Supported formats are JPEG, PNG, and WebP (up to 20MB each), and each upload takes a short caption. Once a task is marked as Completed, no further attachments can be added.
Every task keeps a record of what happened to it — when it was created, status changes, priority changes, date changes, and who it was assigned to or unassigned from. Open the task to see its history.
Tasks can be created automatically using Automations. For example, an automation can create a “Prepare order” task every time an order is confirmed, with a checklist item for each product in the order.This is especially useful for items you may wish to prepare in advance, such as Funeral or Event orders.
Tasks don’t send email or SMS, and task events don’t fire automations — only orders and events do. Assignees see new tasks on their dashboard and in the Companion App.
Your team can view and manage tasks from the Digital Florists App on their phone — see the florist app guide for the full mobile flow, or the driver app guide if you’re working a delivery run.
For jobs that happen regularly, set up a repeat task. Digital Florists automatically creates a new task on your chosen schedule — daily, weekly, or monthly — so it doesn’t slip.Learn more about repeat tasks →
Yes. On the dashboard, use the Assigned To filter to show only tasks assigned to you. You can also view tasks on the Digital Florists App and filter or restrict the view to only tasks assigned to you.
Do tasks have to be linked to an order?
No. Tasks are completely standalone. Linking to an order, customer, or event is optional — it just makes it easier to find related information.
Can drivers see tasks on the mobile app?
Yes. Drivers see tasks assigned to them and tasks linked to their delivery run, and they can mark tasks complete or tick off checklist items. Creating new tasks requires the Tasks (Manage) permission, which Managers and Admins have by default; your administrator can adjust who has it in Settings > Team.
What happens to tasks when an order is cancelled?
Any tasks linked to that order are automatically cancelled too.
Can I track how long tasks take?
You can set an expected duration when creating a task (from 5 minutes to 6 hours). Digital Florists records when tasks are completed, so you can compare expected vs actual time in Task Analytics.
How do I manage task categories?
Go to Settings > Tasks to create, rename, or recolour your task categories. You can choose from 24 colours.