

This page covers features gated by Admin-tier permissions — typically Settings access. Admins have these by default; your administrator can adjust who has them in Settings > Team.
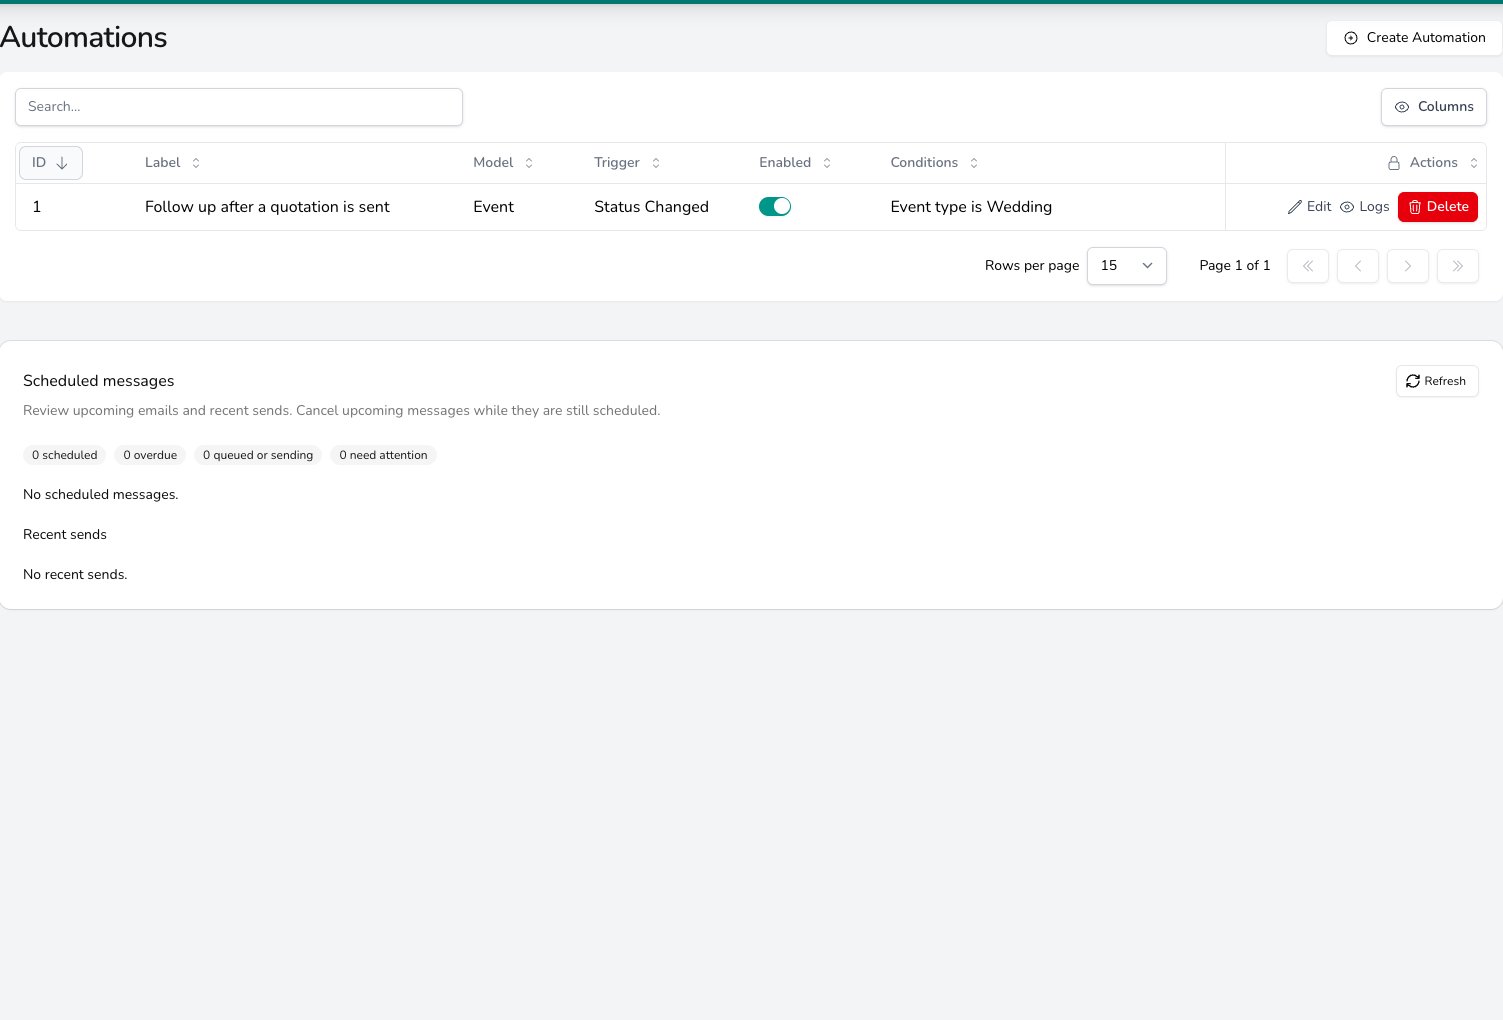
Each automation shows what it applies to, its trigger and conditions, an Enabled switch, and Edit, Logs and Delete actions.
How automations work
Every automation has three parts:
You can think of it as: When this happens, if these things are true, then do this.
Automations work with two types of records:
- Orders, triggered when orders are created, when their status changes (e.g. Confirmed, Fulfilled), or when their payment status changes (e.g. Paid, Refunded)
- Events, triggered when events are created, when their status changes (e.g. Quote accepted, Completed), or when their payment status changes
What automations can do
There are three actions an automation can perform:- Send an email to the customer on the order or event, sent when the automation fires.
- Send a text message (SMS) to the customer’s phone number on the order or event.
- Create a task with a title, description, and optional checklist. You can set its due date a number of days before or after the order’s fulfilment date or the event date (like a prep task 7 days before).
Creating an automation
Go to Settings > Advanced > Automations and click Create Automation.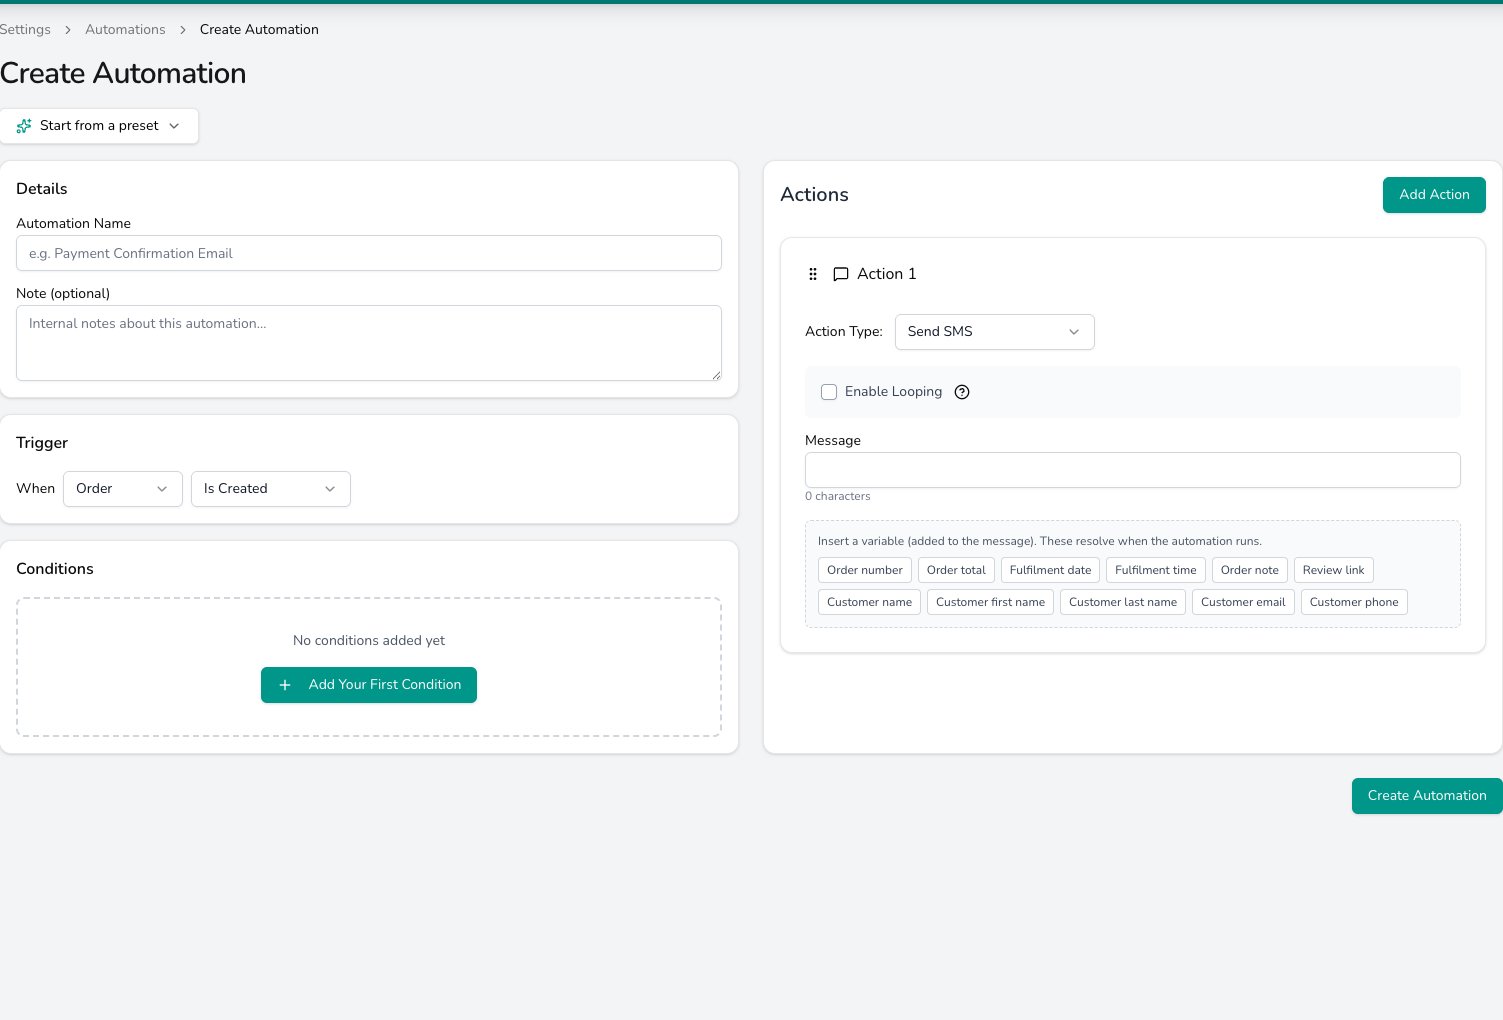
The trigger reads as a sentence under When, conditions sit beneath it, and each action on the right has its own Action Type.
1
Choose what it applies to
Select whether the automation applies to an Order or an Event. This determines which triggers and condition fields are available.
2
Pick a trigger
Choose what event starts the automation: when a record is created, when its status changes, or when its payment status changes. See Triggers & Conditions for the full list.
3
Add conditions (optional)
Add one or more conditions to control when the automation fires. For example, you might only want it to fire for delivery orders, or only for orders from a specific account. All conditions must be true for the automation to run.
4
Set the action
Choose what should happen: send an email, send an SMS, or create a task. Fill in the details like the email subject and body, the SMS message, or the task name.
5
Name it and save it
Give the automation a clear name under Automation Name so you can find it later, then click Create Automation. Switch it on from the Enabled column of the automations list when you’re ready.
Example automations
Here are some common automations florists set up:Scheduled messages
Set an action to go out a number of days before or after a date and its message waits until that day comes round. To see everything that’s waiting, go to Settings > Advanced > Automations and scroll to the Scheduled messages card. Each row tells you which automation the message came from, the order or event it belongs to, when it’s due, and where it has got to. Underneath, Recent sends shows what has gone out lately by email or text. Click Refresh to bring the list up to date. To stop one going out, click Cancel on its row and confirm when prompted. Once a message has started sending it can’t be stopped, and the row tells you so.Enabling and disabling
Each automation can be toggled on or off at any time from the automations list. Disabling an automation doesn’t delete it. You can turn it back on whenever you need it.Common questions
Do I start with any automations?
Do I start with any automations?
Your shop starts with no automations running, but you don’t have to build from scratch: the Start from a preset dropdown on the Create Automation page loads a ready-made automation into the form for you to review, adjust, and save.
Can I have multiple automations with the same trigger?
Can I have multiple automations with the same trigger?
Yes. You can have as many automations as you like, even if they share the same trigger. Each one is evaluated independently.
What happens if an automation fails?
What happens if an automation fails?
The automation is logged with the error details. Your order or event isn’t affected, and a failed automation doesn’t block anything. Check the Logs to see what went wrong.
Do automations work for POS sales?
Do automations work for POS sales?
Yes. POS sales create orders, so any order-based automation will fire for POS transactions too.
What’s next?
Triggers & Conditions
All the triggers and condition fields you can use.
Actions
Send emails, texts, and create tasks automatically.
Logs & Troubleshooting
Check what your automations have done and fix issues.
Notifications
The built-in emails and texts, and how they differ from automations.