Plan delivery runs, optimise routes, and get orders out the door.
The Delivery section is where you plan your delivery runs, assign orders to drivers, and track deliveries as they happen. Digital Florists maps out the most efficient route so your drivers spend less time on the road and more time making deliveries.
New to Digital Florists? Configure your delivery windows and coverage area first — see Delivery Slots. The driver experience on the phone is covered in the driver app guide; to send orders by courier instead of in-house delivery, see Courier Orders.
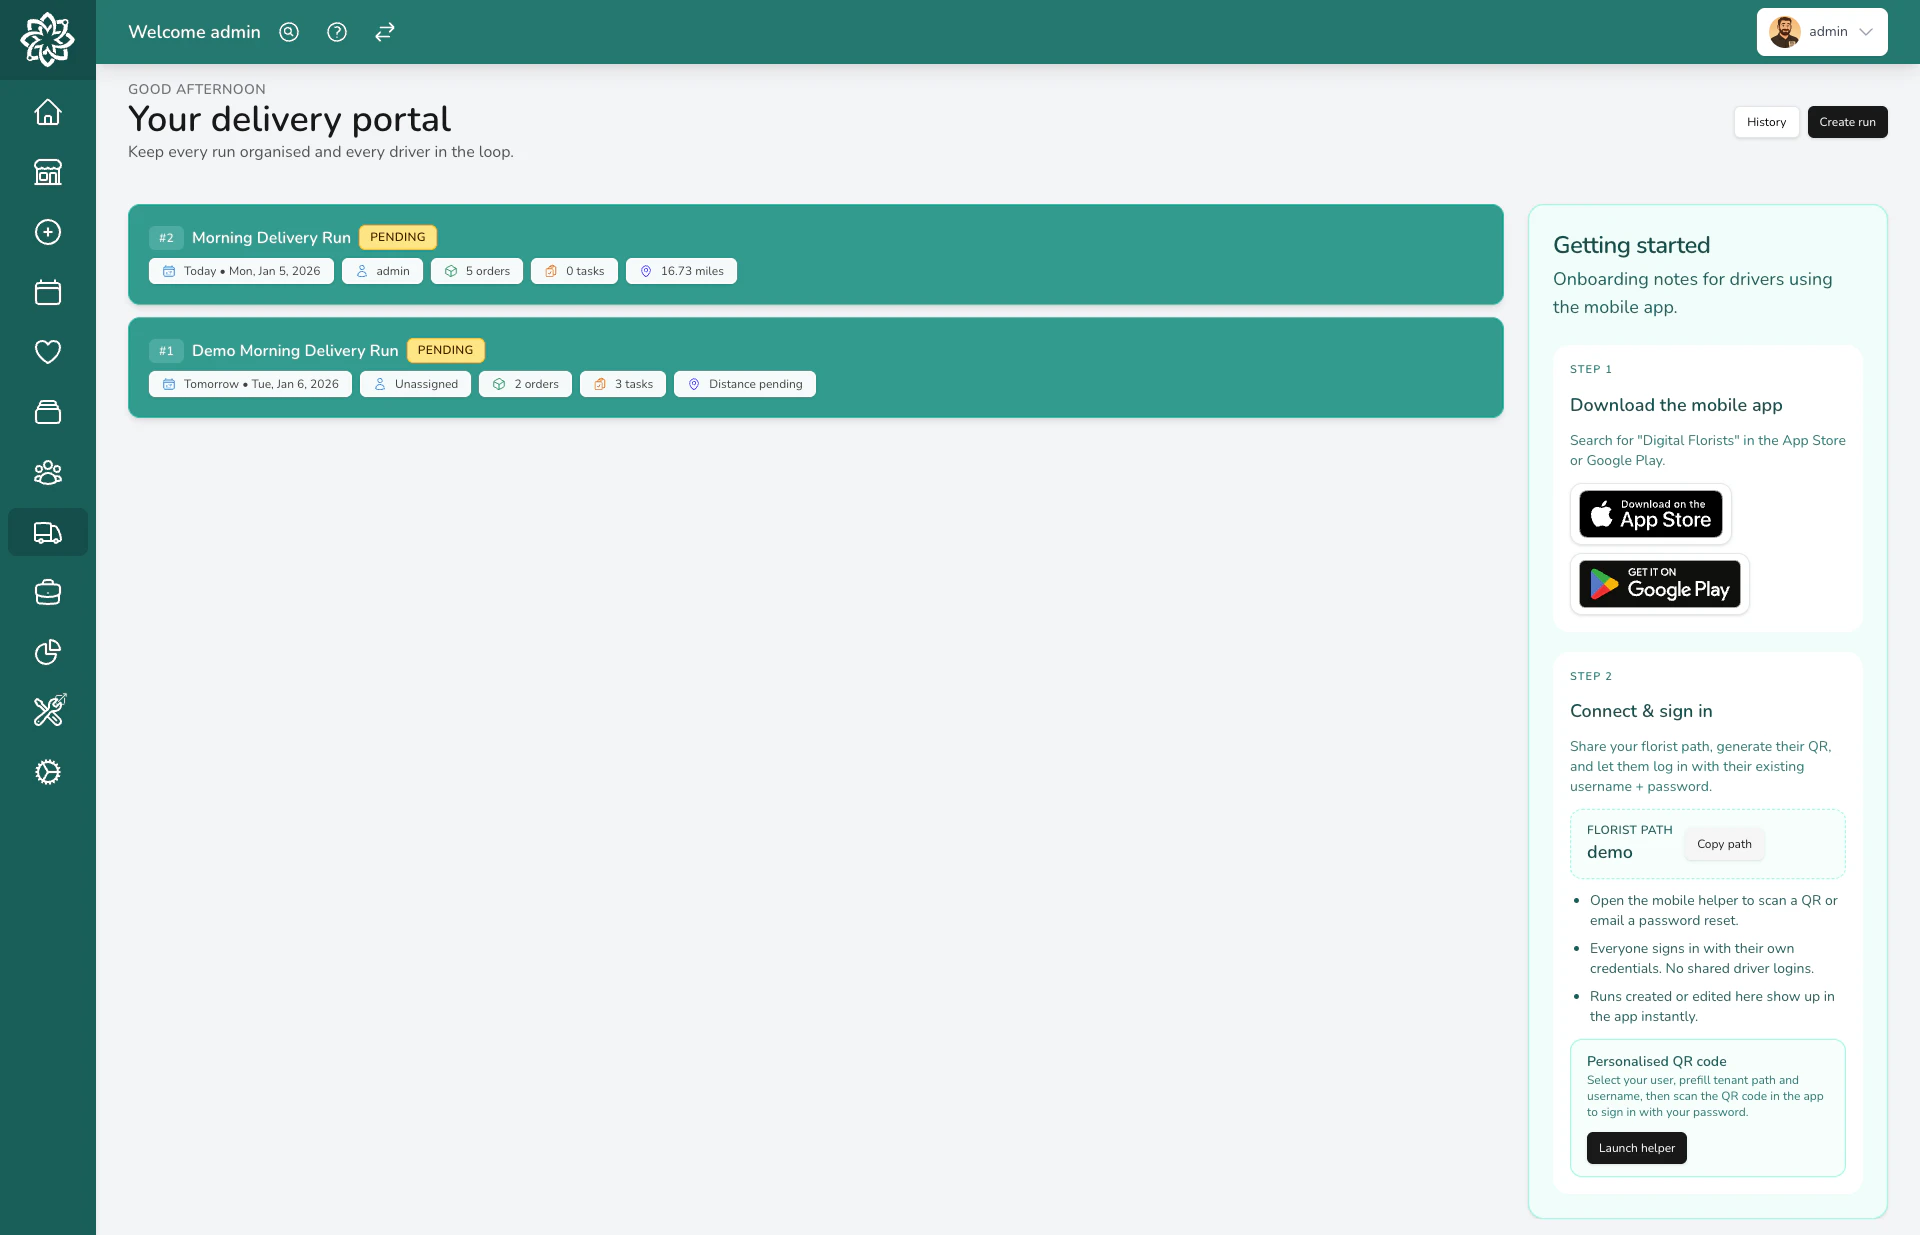
When you open Delivery, you see the delivery portal — a list of every run in your shop. Each run shows its date, the driver’s name, the number of stops, and the run’s status (pending, ongoing, or complete).
The delivery portal with all delivery runs listed
Unassigned delivery orders appear in a separate list, ready to be added to a run. Tasks linked to an address can be added the same way.
A delivery run is a single trip for one driver. You create a run, add the orders, and Digital Florists plans the route.
Creating a new delivery run
1
Create the run
Go to Delivery and click Create Run. Choose the date, assign a driver from your team, and set a Planned Departure time so route timings are based on when the van leaves, not when you built the run.
Any team member can be assigned as a driver — no separate driver account needed. To use the driver app on a phone, the assignee also needs the Driver App Access permission (Drivers have this by default; you can grant it to other team members in Settings > Team).
2
Add orders or tasks
The map shows all unassigned delivery orders for that date as pins, along with any tasks linked to an address. You can:
Click individual map pins to add specific items
Select multiple items from the list on the left
Use the Select All button to assign everything unassigned to this run
Each stop shows the customer or task name, address, and time slot so you can decide what belongs on which run.
3
Optimise the route
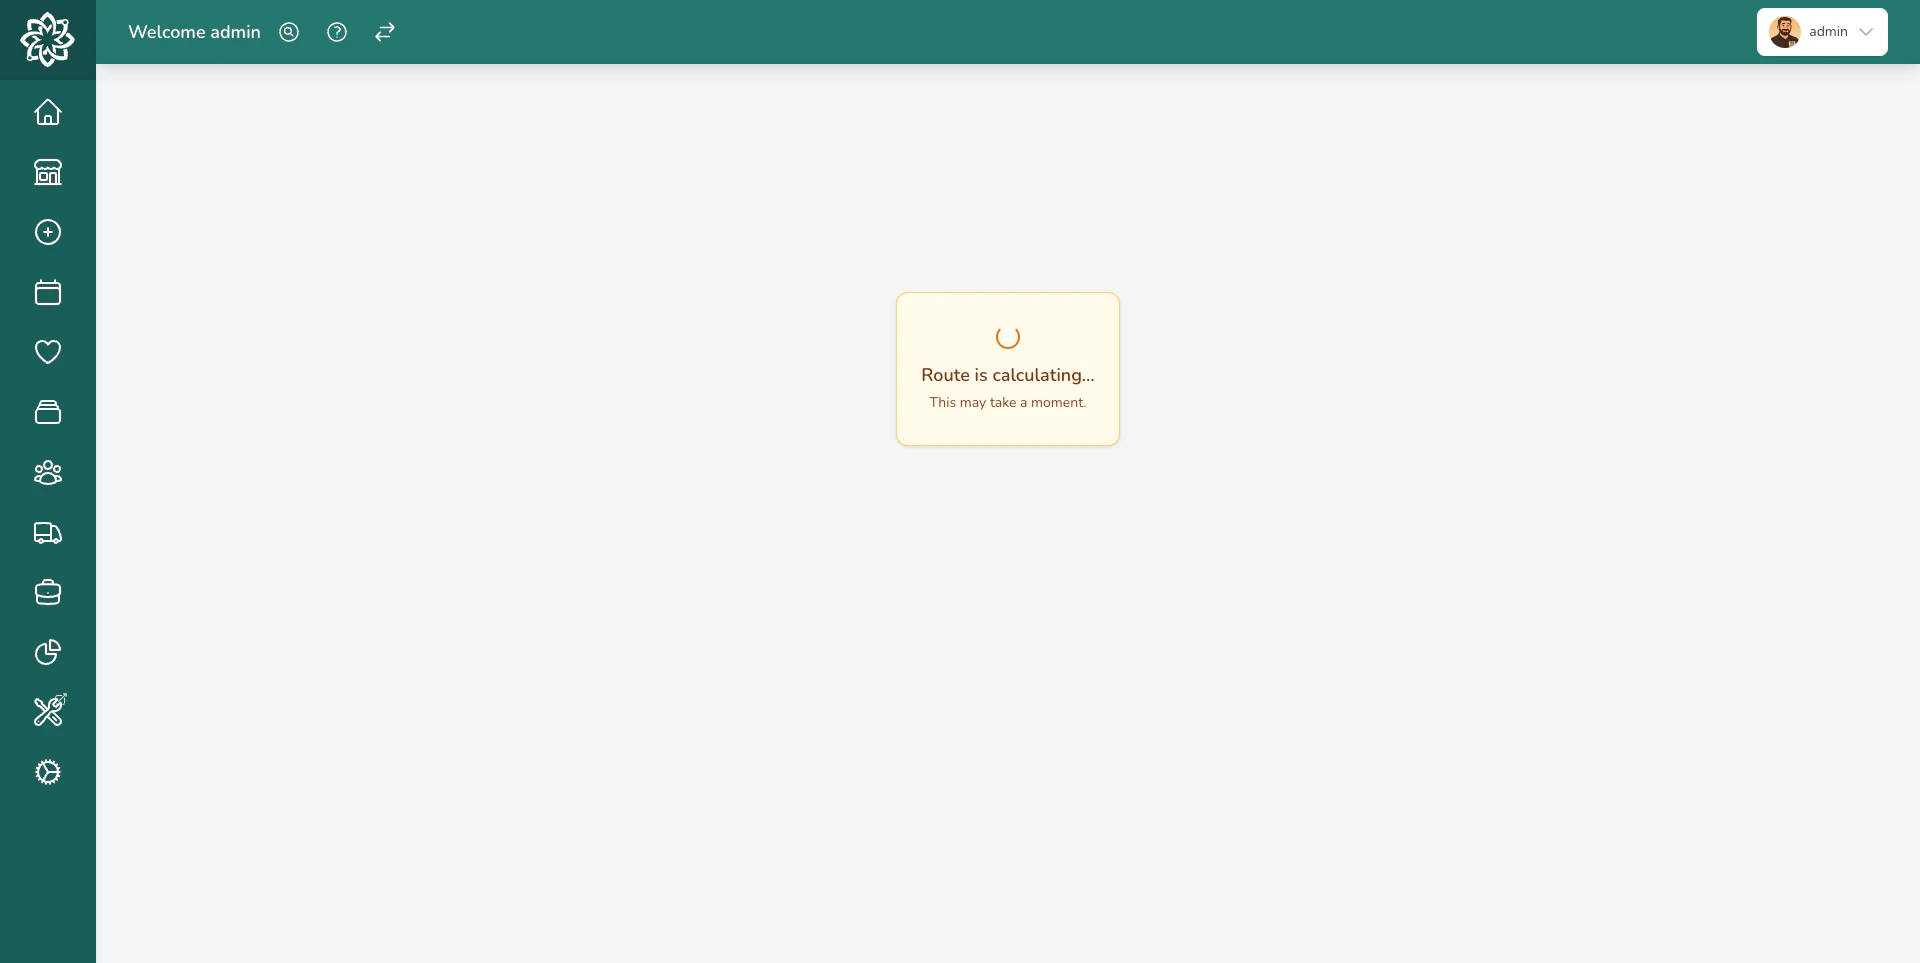
Click Recalculate to let Digital Florists work out the best order for the stops. It takes time slots into account — AM deliveries come before PM ones, and timed deliveries are slotted in at the right point.
Delivery run with an optimised route on the map
Digital Florists uses mapping services to calculate the fastest route between stops, accounting for real road distances (not straight lines).
4
Review and adjust
Check the route looks right. You can drag and drop stops to change the order if you know a quicker way — for example, if there’s roadworks or you want to group nearby deliveries together.The estimated drive time and total distance are shown so you know roughly how long the run will take.
You can create multiple runs for the same day — one per driver, or split into a morning run and an afternoon run if that suits your workflow better.
When creating a run, you’ll see several options that control how routing works:
Respect Time Requests — when ticked, the route planner considers each order’s time slot (e.g. AM, PM, or a specific window) and plans the route so the driver arrives within those windows. Make sure the run is going out soon after you create it — if the driver leaves an hour later than planned, the time-based routing may no longer be accurate.
Lock Sequence — prevents the route from being recalculated or reordered. Useful when you’ve manually arranged stops and don’t want anyone changing them.
Disable Auto Calculation — stops Digital Florists from routing every time you add orders. Useful during peaks when you’re adding orders throughout the day. When you’re ready to route, untick this option and click Recalculate.
Some orders need to go out before everything else — a funeral tribute, for example. Set the order’s fulfilment time to First and it’s delivered before every other stop on its run, with no time slot needed. The route builder flags delivered-first orders while you’re planning, so you can see what a run contains before you route it. If a run has several, they all come before the other stops — if they’re far apart, consider splitting them across runs.
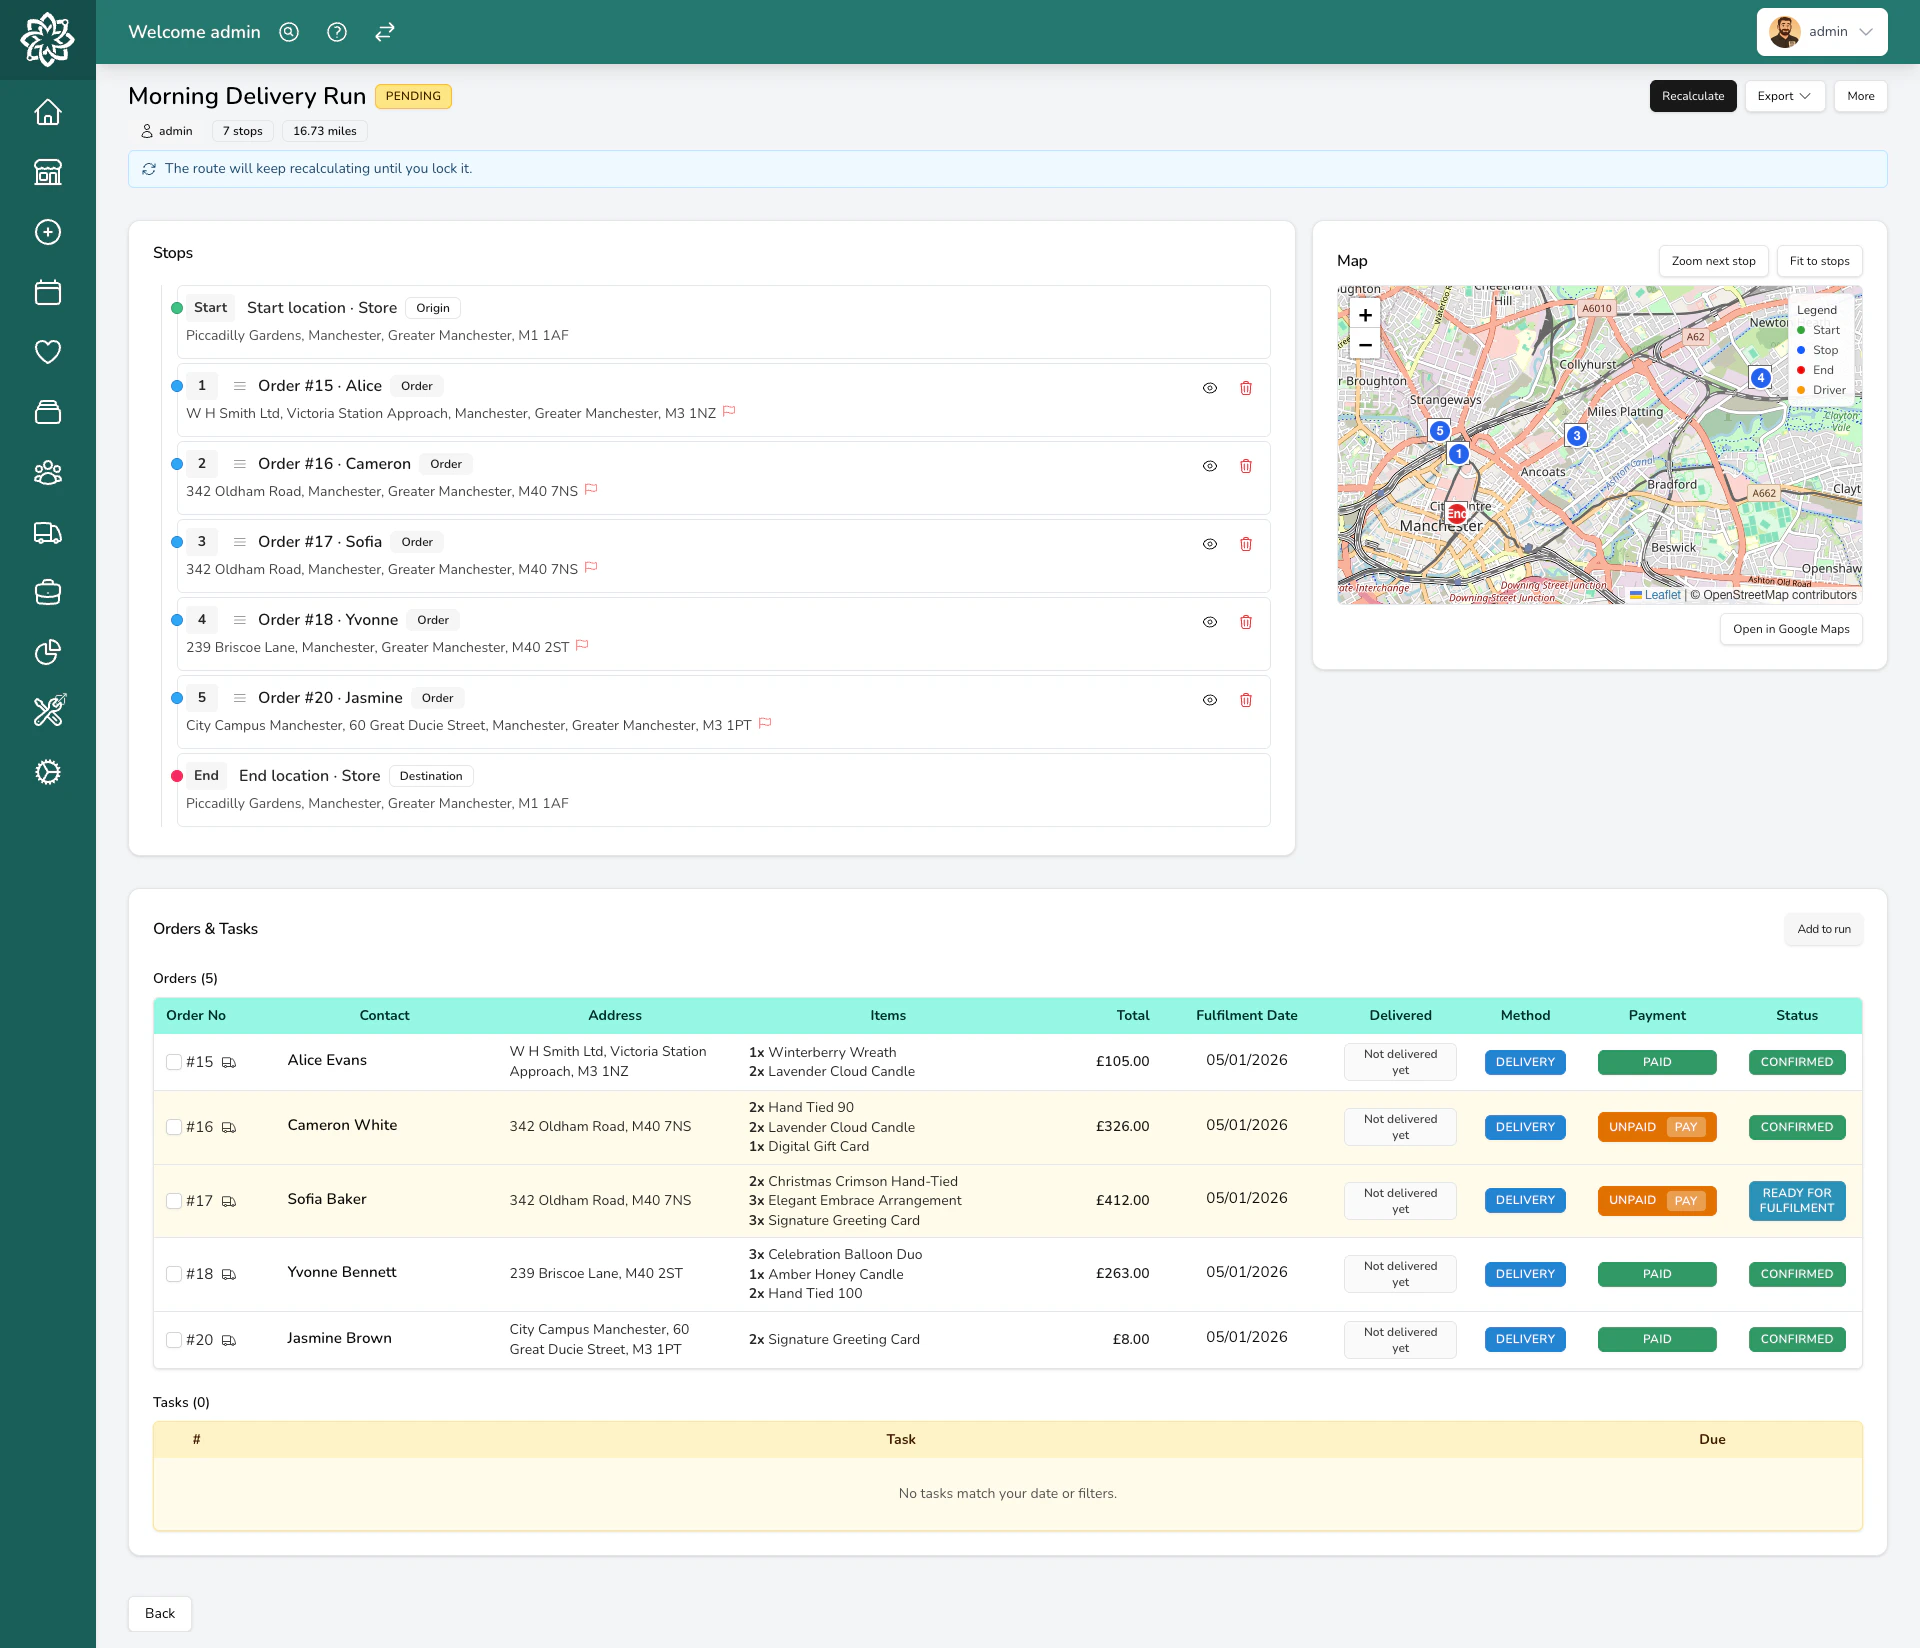
Click on any run to see all the stops, the route on the map, and the current status of each delivery.
Delivery run details with the route and stops
Each stop shows:
The order number and customer name
The delivery address
The time slot (AM, PM, or a specific window)
The estimated arrival time, based on the planned departure and the route
The status — pending, delivered, or carded
The run also shows a projected return time to the shop and whether the run is on schedule or running behind. While the run is ongoing, you can watch the driver’s route on the map as it happens, and the screen updates as deliveries are completed so you can see exactly how many stops are left. See Tracking & Proof of Delivery for the live map and what customers can see.
Digital Florists calculates the best route using a professional mapping service that accounts for real roads, traffic patterns, and one-way streets. Routing falls back to a simpler estimate if the mapping service is unavailable.
Fallback warning when optimisation is unavailable
If you see a fallback warning, double-check the stop order manually before sending your driver out. Basic routing may not account for one-way streets or traffic patterns.
The optimiser also respects time windows — if an order has a timed delivery slot (e.g., “between 2pm and 4pm”), the route is planned so the driver arrives within that window.Route timings include time at the door as well as driving. The Time Allowed at Each Delivery Stop setting (Settings > General > Delivery) covers parking, walking to the door, and handover at each stop — 5 minutes by default, adjustable from 2 to 15 minutes.
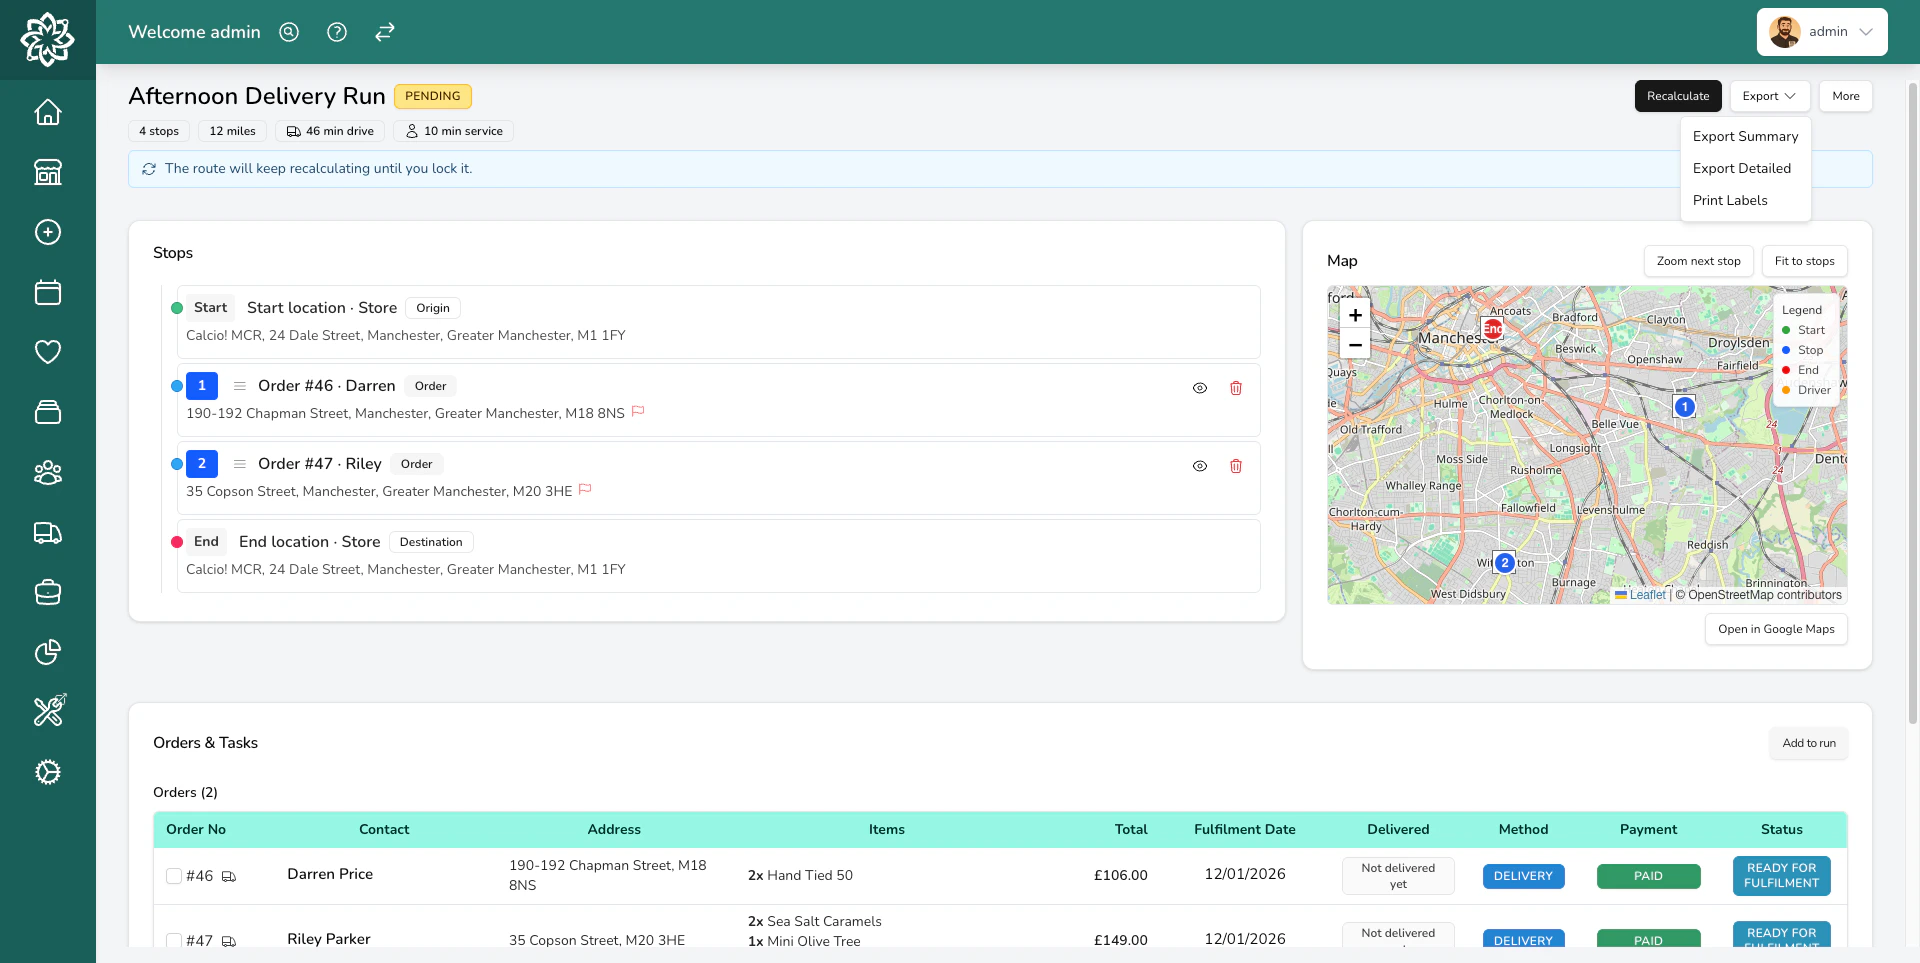
Things you can optionally print from the run detail screen — useful if a driver isn’t using the app, or to help load the van at peaks:
Manifest — a summary of all stops in order, with addresses, time slots, and any special instructions. Includes a QR code your driver can scan to load the run on their phone. Choose between a detailed manifest (full address, card message, and special instructions) or a slim manifest (just addresses and stop numbers).
Route Labels — stickers with large stop numbers (#1, #2, #3) that you attach to each arrangement. The driver doesn’t have to search through the van for the right order at each stop.
Order labels for the run — print the order labels for every stop on a run in one go. They come out in route order, which is handy if you make to order along the run (lilies, for example), or if you pick and label at point of sorting during peaks.
When you have a high volume of orders (Valentine’s Day, Mother’s Day, Christmas), building delivery runs by area makes things much more manageable.
1
Filter by postcode
When adding orders to a run, use the postcode filter to show only orders in a specific area. For example, filter by “M3” to see just the M3 deliveries.
2
Disable route calculation
When creating a run, disable route calculation. This stops Digital Florists from routing the run every time you add orders — you’ll calculate the route once you’re done adding. It saves time when you’re building runs throughout the day.
3
Name runs by area and time
Give your runs clear names like “M3 AM”, “M3 PM”, “City Centre”, or “Outer Villages”. This makes it easy to see at a glance which areas are covered and which still need organising.
4
Build runs throughout the day
As new orders come in, filter by postcode and add them to the relevant run. Keep checking back — what started as 165 unassigned orders quickly becomes a set of manageable, organised runs.
5
Route and assign when ready
Once a run is full, click Calculate Route to optimise the stop order, then assign it to the driver who’s taking it out. Only that driver will see the run on their app.
Print labels after routing — they print in route order, so you can load the van in the right sequence. Each label carries a large stop number (#1, #2, #3) to match the driver’s run.
You can add orders to a run even after the driver has started. New stops are added at the end of the run so the driver’s current route isn’t disrupted. If a new stop should come earlier, drag it into place. Either way, the driver sees it on their app straight away.
To remove an order from a run, open the run and click the remove button next to the stop. The order goes back to the unassigned list, ready to be added to a different run or rescheduled.
If a run has to finish early, you can end it while stops are still undelivered — you’ll be asked to confirm first. The undelivered orders are returned to the shop, ready for fulfilment, so you can add them to another run or reschedule them.
Can I add more orders to a run after it's started?
Yes. New stops are added to the bottom of the run so the driver’s current route stays put — drag the stop into the right position yourself if needed. The driver sees the new stop appear in the app.
What if a delivery fails?
The driver can mark a stop as Carded (left a card because nobody was home) or remove it from the run with a reason. The order stays on your dashboard so you can reschedule it or contact the customer.
Can I have multiple drivers out at the same time?
Yes. Create a separate run for each driver. Each driver sees only their own run on the app.
Do I need the Digital Florists App for drivers?
It’s not required, but it makes things much easier. Without it, you’d need to print the manifest and have the driver update statuses manually when they return. With the app, the driver gets GPS navigation, marks each stop as it happens, and captures proof-of-delivery photos. See the driver app guide for the full flow.
Can I create runs for future dates?
Yes. You can plan runs in advance for any date. This is useful if you know tomorrow’s orders are ready and want to have the run set up before the morning.
Can orders be marked as ready when I add them to a run?
Yes, but it’s off by default. To turn it on, go to Settings > General > Delivery and enable Mark orders as ready automatically when creating a delivery run. With this on, any order added to a run is flipped to Ready, which is useful if you build runs only when everything’s prepared. Leave it off if you want to build runs in advance while orders are still being made — they’ll keep their current status. If orders were marked ready by mistake, you can return them to the queue, but that removes them from the run.
What happens to delivery orders that aren't assigned to a run?
They stay in the unassigned list on the delivery portal. They’ll also show on your dashboard as delivery orders without a run, so nothing gets forgotten.