

This page covers features gated by Admin-tier permissions — typically Settings access. Admins have these by default; your administrator can adjust who has them in Settings > Team.
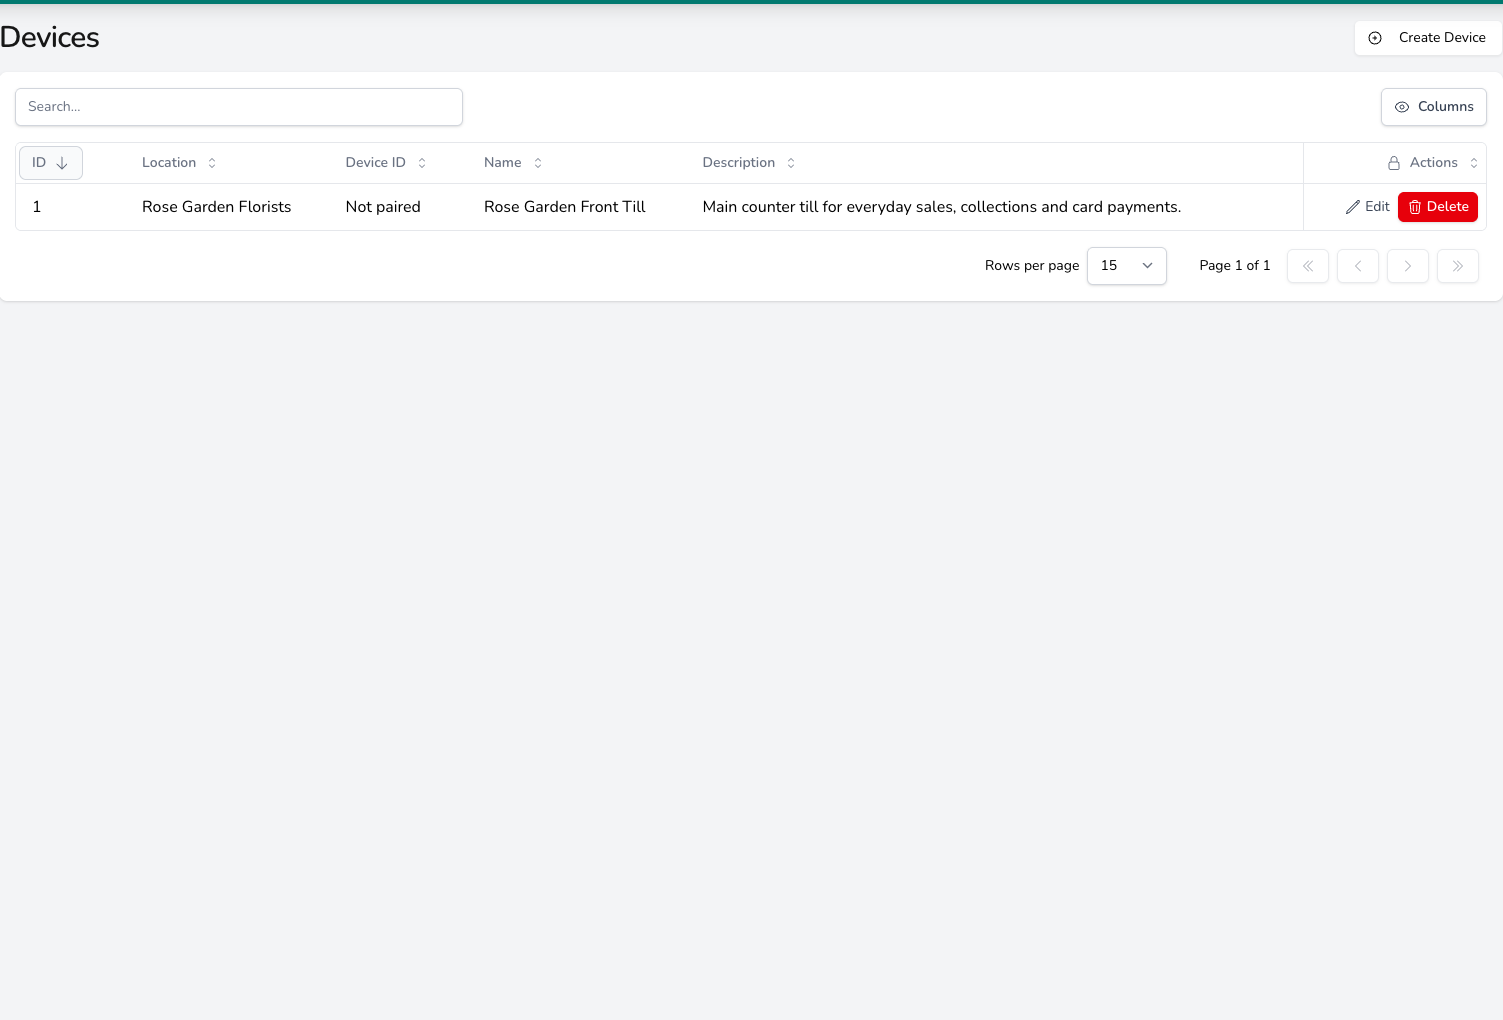
Registered devices are listed with their location, pairing status and a plain-language description, ready to pair with the point of sale.
What is a device?
A device is a named till point linked to a location. If your shop has one counter, you’ll have one device. If you have two tills side by side, or more than one shop, you’ll have a device for each. Every device keeps its own:- Payment methods, which decide what customers can pay with at that till
- Receipt printing, whether receipts print through Connect and whether they print without asking
- Petty cash, whether staff can record cash in and out on that till
- Till sessions, a full history of every session opened and closed on that device
Creating a device
Click Create Device. Give the device a Name your team will recognise, such as Front till, pick its Location, and add a Description if it helps. Tick the payment methods that should appear at checkout on this device, decide whether to Enable petty cash, and click Create device.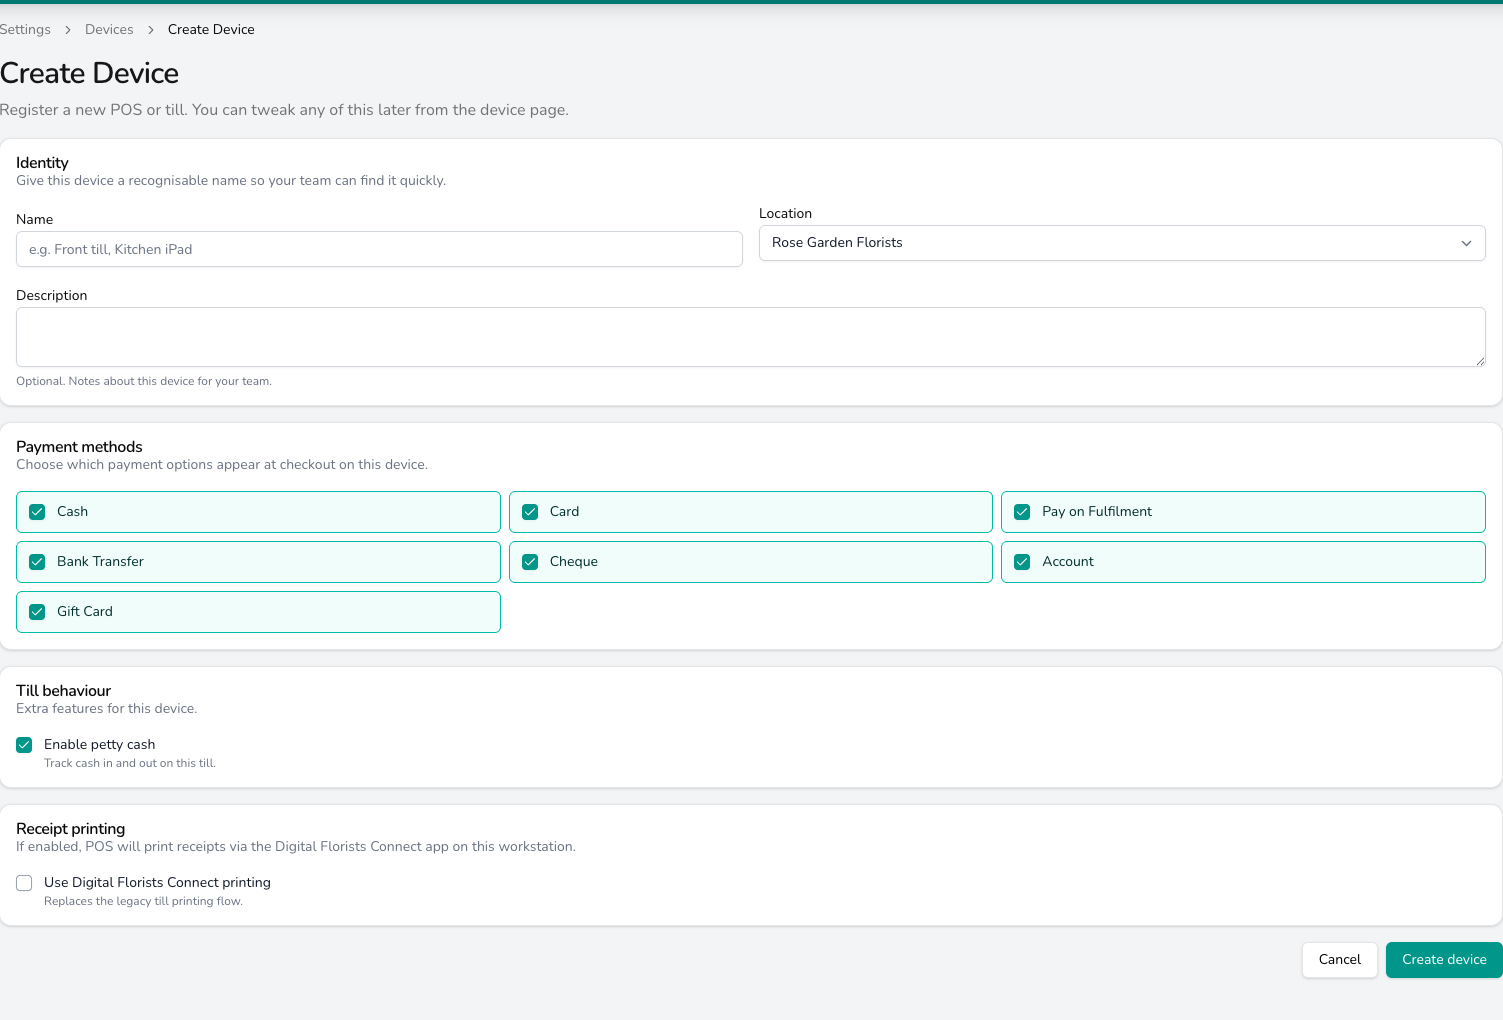
Name the till, pick its location and tick the payment methods it offers before you click Create device.
Pairing a device with the point of sale
A new device shows Not paired under Device ID until a browser picks it up. Open the POS on the till’s computer and the Select a Device screen lists the devices at your location. Choose the one for this till and you go straight to the POS. Your browser remembers the device from then on, so it skips the screen next time. Each device shows Available when it’s free or In Use when another browser has already picked it.Point of sale access in Point of sale settings decides whether a device is tied to one browser. With Dedicated device per till, a device already in use is greyed out on other browsers. With Allow any device to use any till, any browser can pick any device.
Device settings
Open a device with Edit to change how it behaves.Payment methods
Choose which payment methods appear at checkout on this device. A main till might take cash and card while a second counter takes card only. What each method does is covered in Payment Methods.Receipt printing
Tick Use Digital Florists Connect printing to print till receipts through Digital Florists Connect on that computer. Leave Print receipts automatically after payment ticked and every paid sale prints without a prompt; untick it and staff confirm each receipt before it prints. Only change the Connect port if Connect on that computer is set to a different one.Petty cash
Tick Enable petty cash and staff can record small cash movements during a session, such as paying a supplier or buying stamps. These count towards the End of Day figures for that till. Untick it and the petty cash option doesn’t appear on that device. This is set per device. The shared till choices, such as the walk-in customer and how sessions are counted, live in Point of sale settings.Multi-till setups
If you run more than one till, each one is a separate device with its own session. That means:- Separate sessions, so each till opens and closes on its own with its own float, transactions and End of Day report
- Different payment methods, so one till can take cash and card while another takes card only
- Different printers, so each till prints to the receipt printer beside it
- Separate staff, so each session records who was working that till
Hardware
All hardware connects through Digital Florists Connect, the desktop app that sits between your browser and your printers.Receipt printers
Digital Florists works with thermal receipt printers using ESC/POS (Epson and generic) or Star Line (Star Micronics). For the current models Connect tests and detects, the paper widths and how to connect them, see Receipt printers. Only the tested models are detected and set up without manual steps.Label printers
For delivery labels showing the recipient’s name, address, order number and a QR code, Connect works with Brother QL and Zebra label printers. For the current models and roll sizes, see Label printers.Cash drawers
Cash drawers connect through your receipt printer, not directly to your computer, and open on their own when you take a cash payment. You can also open the drawer from the POS. See Cash drawer for wiring and setup.Common questions
What if I only have one till?
What if I only have one till?
Create one device. Choose it the first time you open the POS and your browser remembers it from then on.
Do I need a device for each computer?
Do I need a device for each computer?
Yes. Each computer that runs the POS should be paired with its own device, so each till has its own session, cash count and receipts.
Where do the Connect printing settings on a device come from?
Where do the Connect printing settings on a device come from?
They match the Connect app installed on that till’s computer. Install Connect, pick the receipt printer in its setup wizard, then tick Use Digital Florists Connect printing on the device. See Receipts through Connect.
Can I use a regular office printer for worksheets?
Can I use a regular office printer for worksheets?
Yes. Worksheets and order documents print through your browser’s own print function, which works with any printer on your computer. Connect is only needed for thermal receipt printers, label printers and cash drawers.
What if my printer isn't detected?
What if my printer isn't detected?
Check that Connect is running and that the printer is powered on and connected. Click Discover Printers in Connect to scan again. For network printers, try entering the IP address by hand. See the Connect troubleshooting guide for more help.
Do I need Connect for barcode scanners?
Do I need Connect for barcode scanners?
No. USB barcode scanners work as keyboards: they type the barcode number into whatever field is active on screen. Plug the scanner in and scan a barcode while the POS search field is focused.
Can I use the same printer for receipts and labels?
Can I use the same printer for receipts and labels?
No. Receipt printers and label printers use different paper, so you need one of each.
What’s next?
Payment Terminals
Register card readers and pair each one with the till it sits beside.
Point of sale settings
The walk-in customer, device access and how till sessions are counted.
Point of Sale
Ringing a sale through the till from start to finish.
End of Day
Close your till and review the day’s takings.